Apr 15, 2024
Retool is a powerful no-code/low-code builder for creating web applications. Retool is well known for their tools to create internal applications like dashboards, however, in recent years they've expanded to visual workflow automations and forms that connect to databases.
By using Retool Forms product teams can quickly spin up hosted web forms to gather data and then use Retool Workflows to orchestrate the data to databases, other applications, or emails.
Examples:
Waitlists
Applications for review
Change requests
Vendor inventory
Product feedback
Surveys
Meeting scheduling
In this blog post, we'll look at our options for taking in Retool Form submissions for a hypothetical waitlist and then routing them through Retool Workflows to send a confirmation email.
Retool Forms
To get started, let's create a simple Retool Form for our waitlist.
After creating a new form on Retool, we can use the 'Start from scratch' option to use the built-in Retool database to store our form submission data:
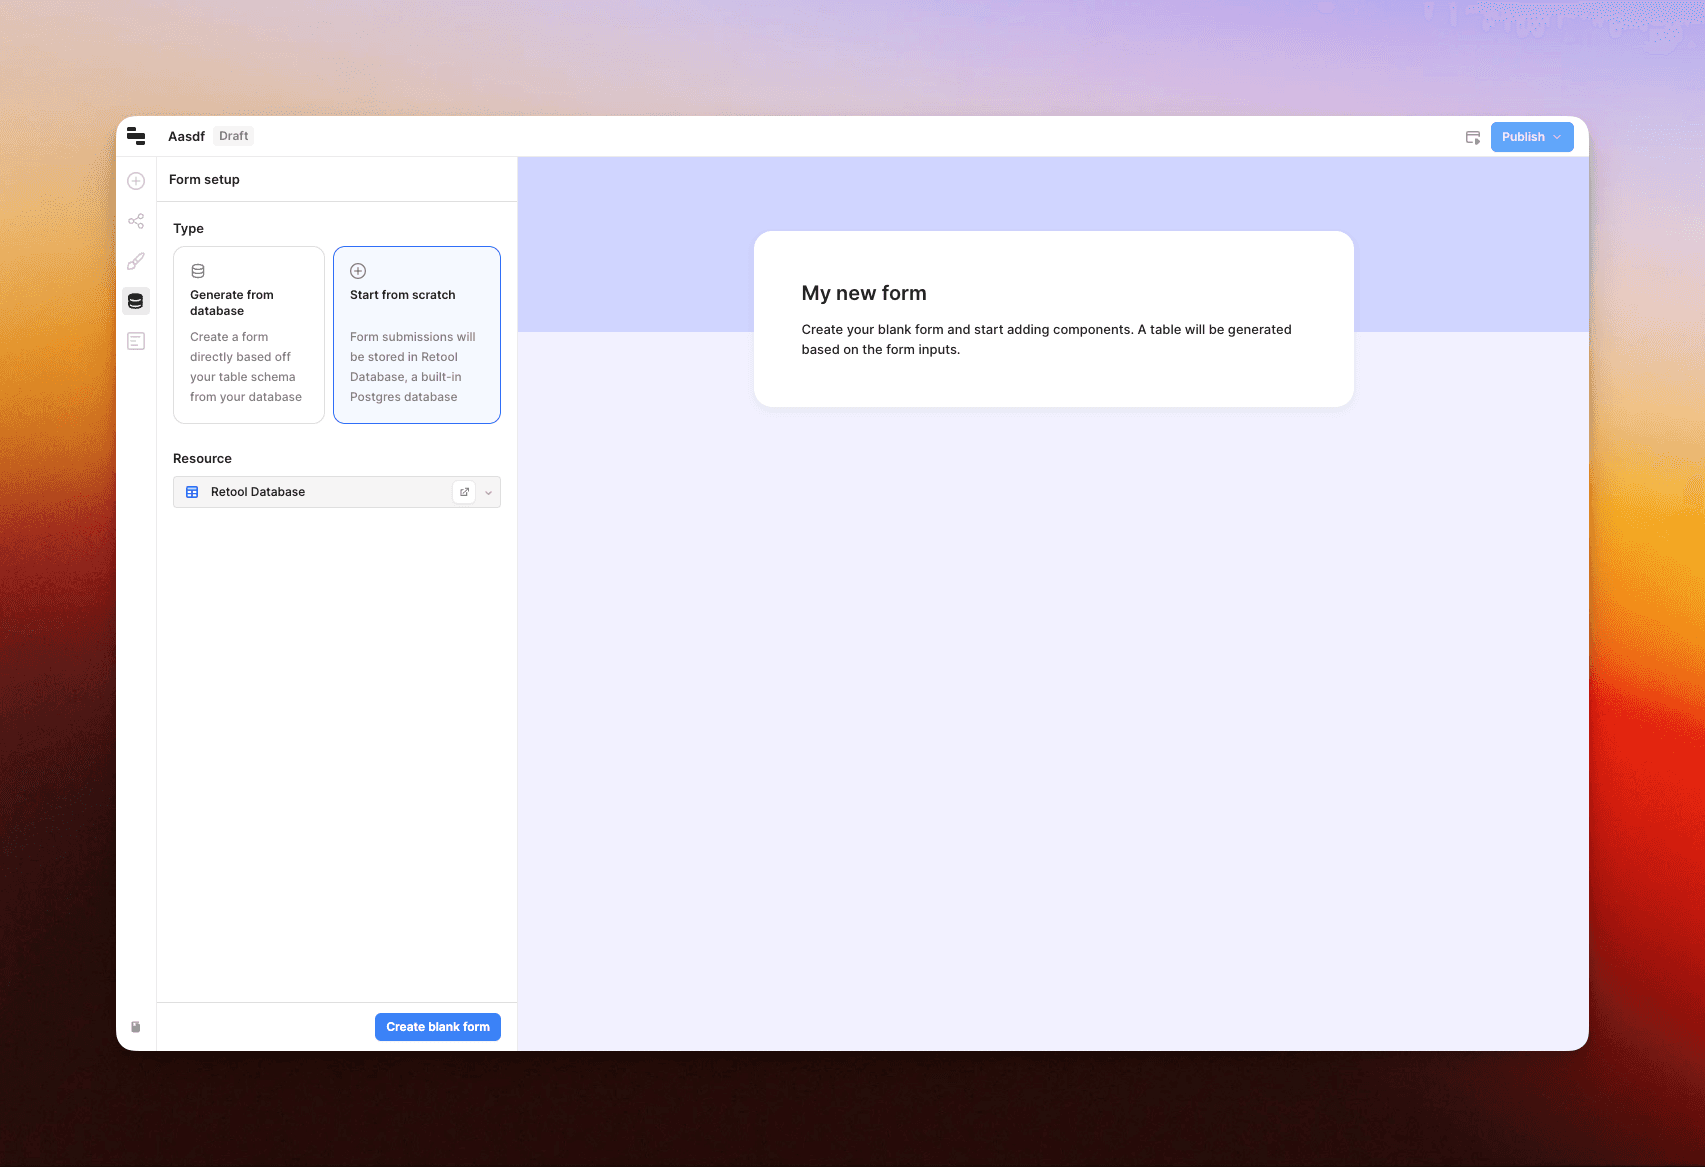
From here, we can add a couple form fields for the data that we want to capture.
Retool has a set of drag-and-drop components to add form fields. In this case, we'll add an email component input for an email field and a text input component for the fullName:
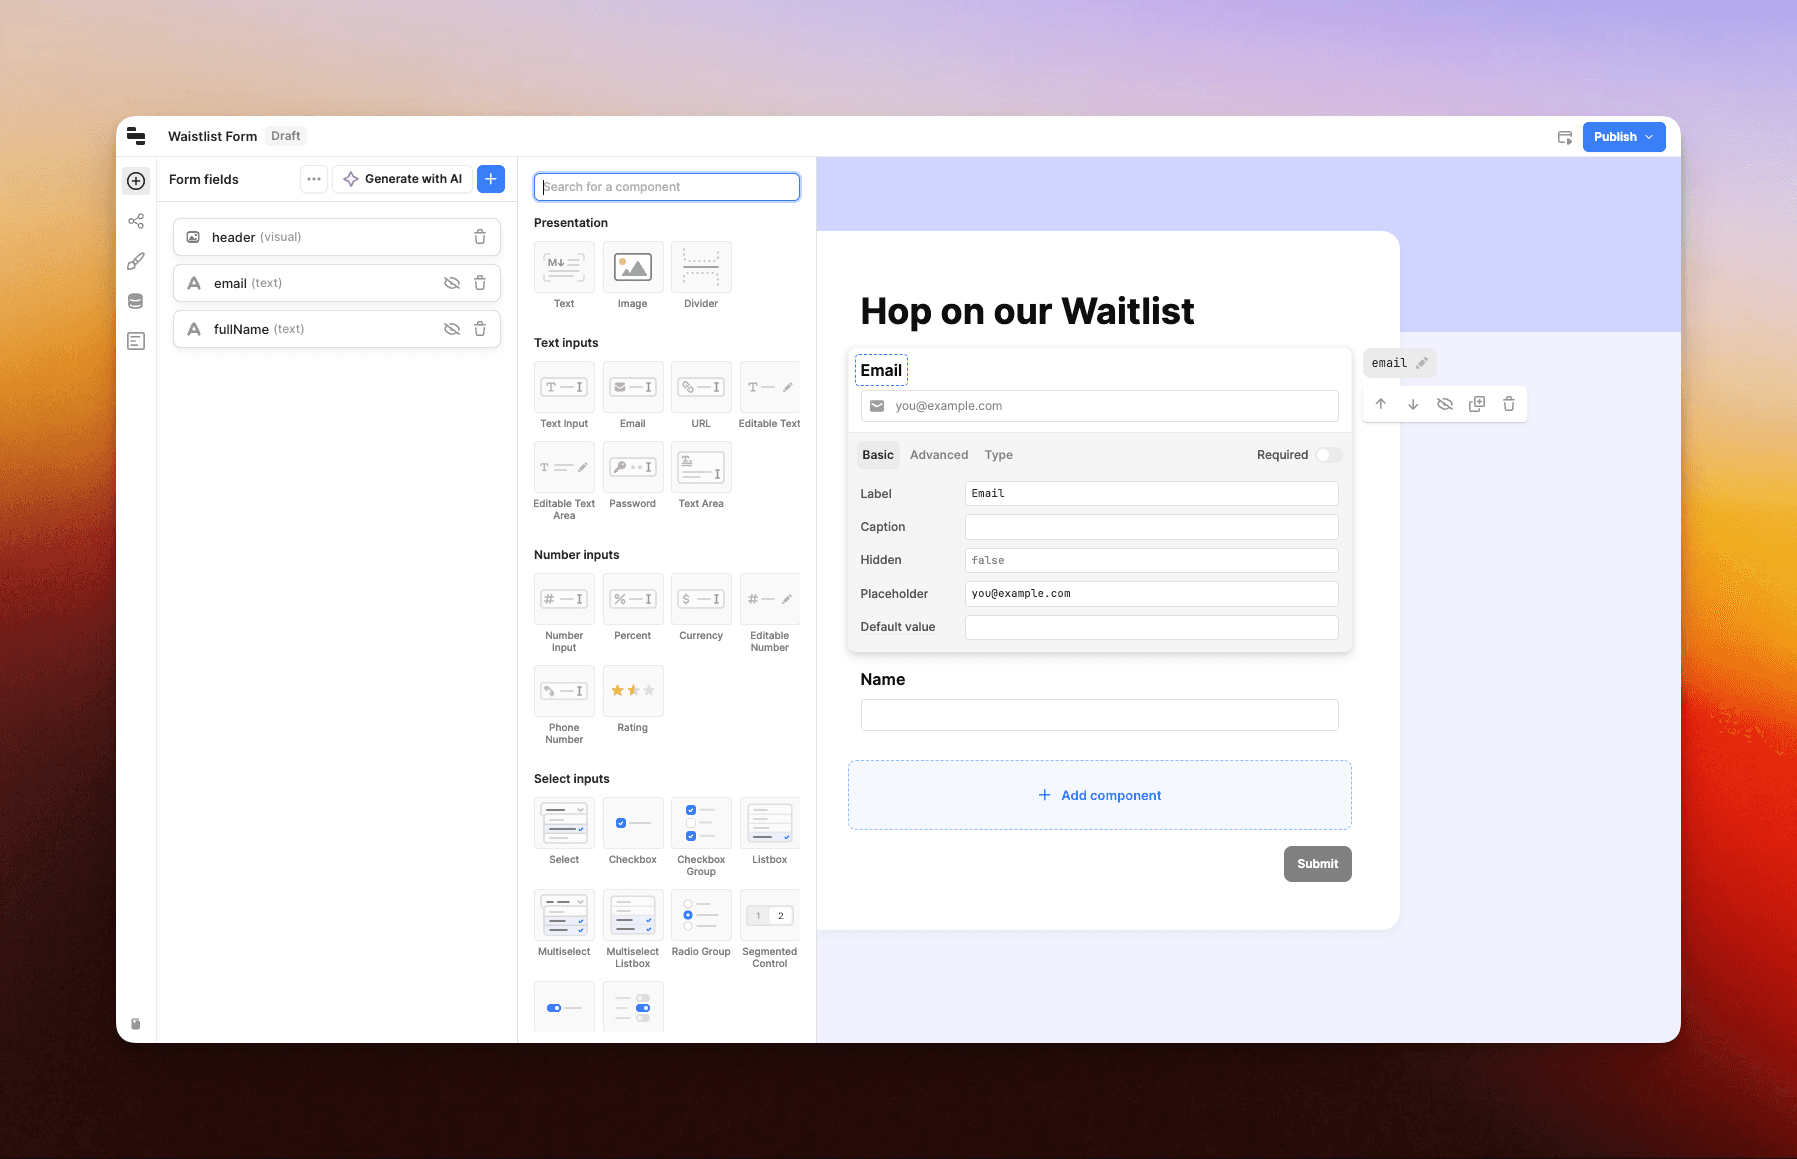
After adding the fields, click "Publish" to publish the form to a hosted page on Retool.
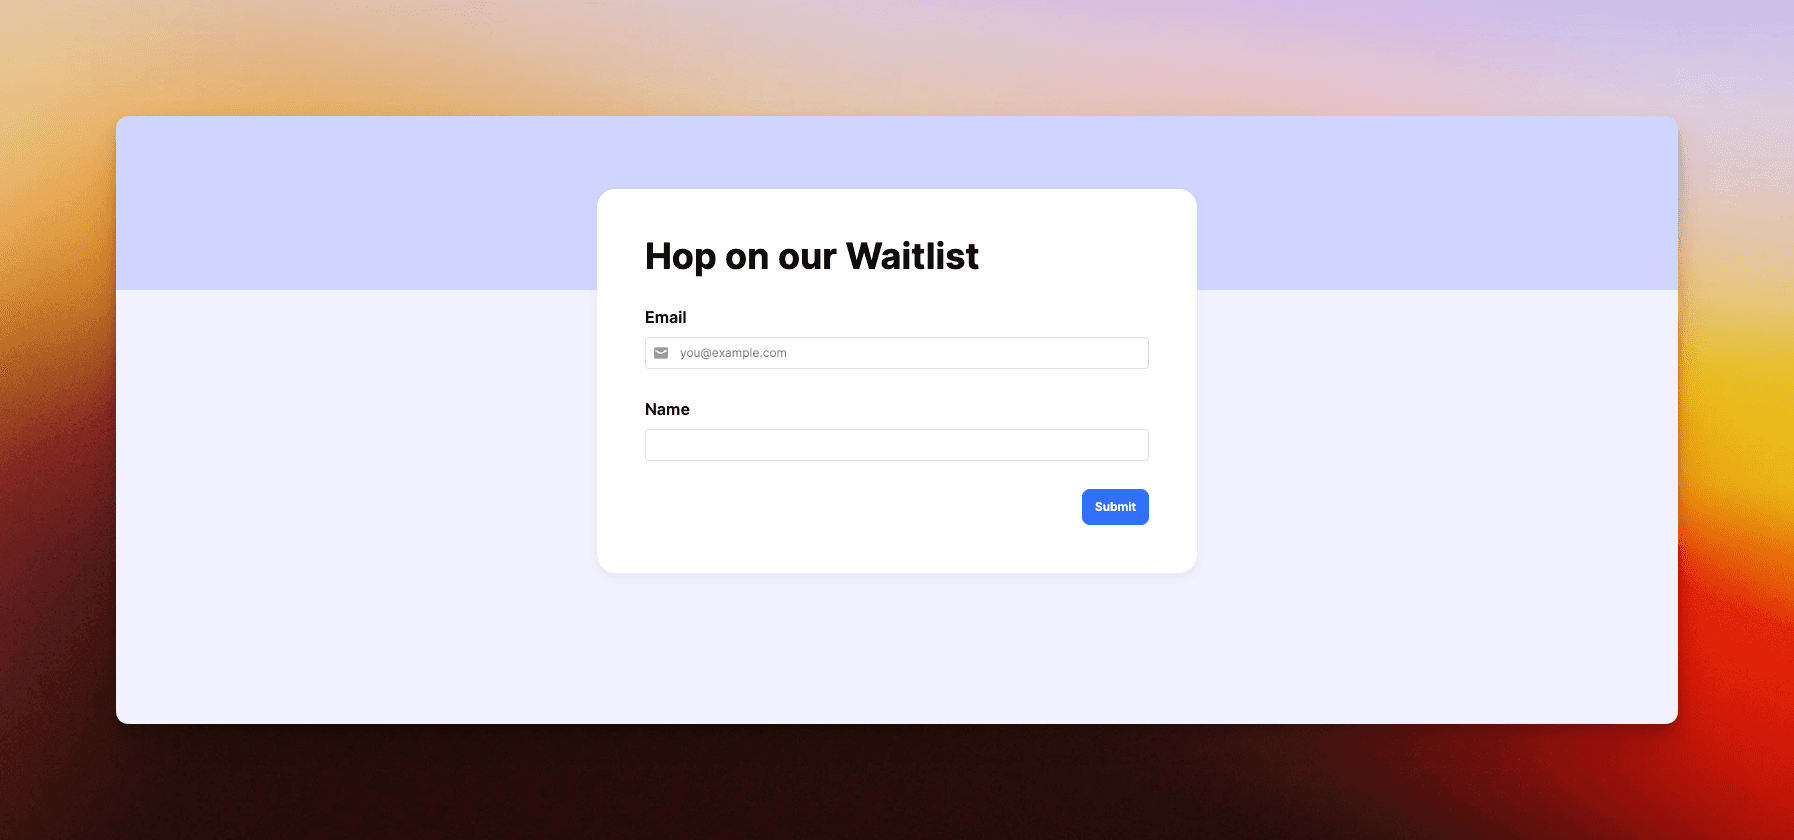
This is now a fully functional form that can be shared and new form submissions are added to our database.
However, what if we want to send an email confirmation after a user adds a submission? In the next step, we'll take advantage of Retool Workflows to accomplish this.
Retool Workflows
With our Waitlist Form now setup, we'll setup a simple automation to trigger an email (or multiple emails) after someone submits the form.
Start by creating a new Retool Workflow and then open it in the builder.
Modify the startTrigger to be a webhook (flip the switch) and then set the "Test JSON Parameters" to match the form field input fields that we setup in the previous step (email and fullName). This is the data that we'll expect to be passed in into the workflow (from the form). Example:
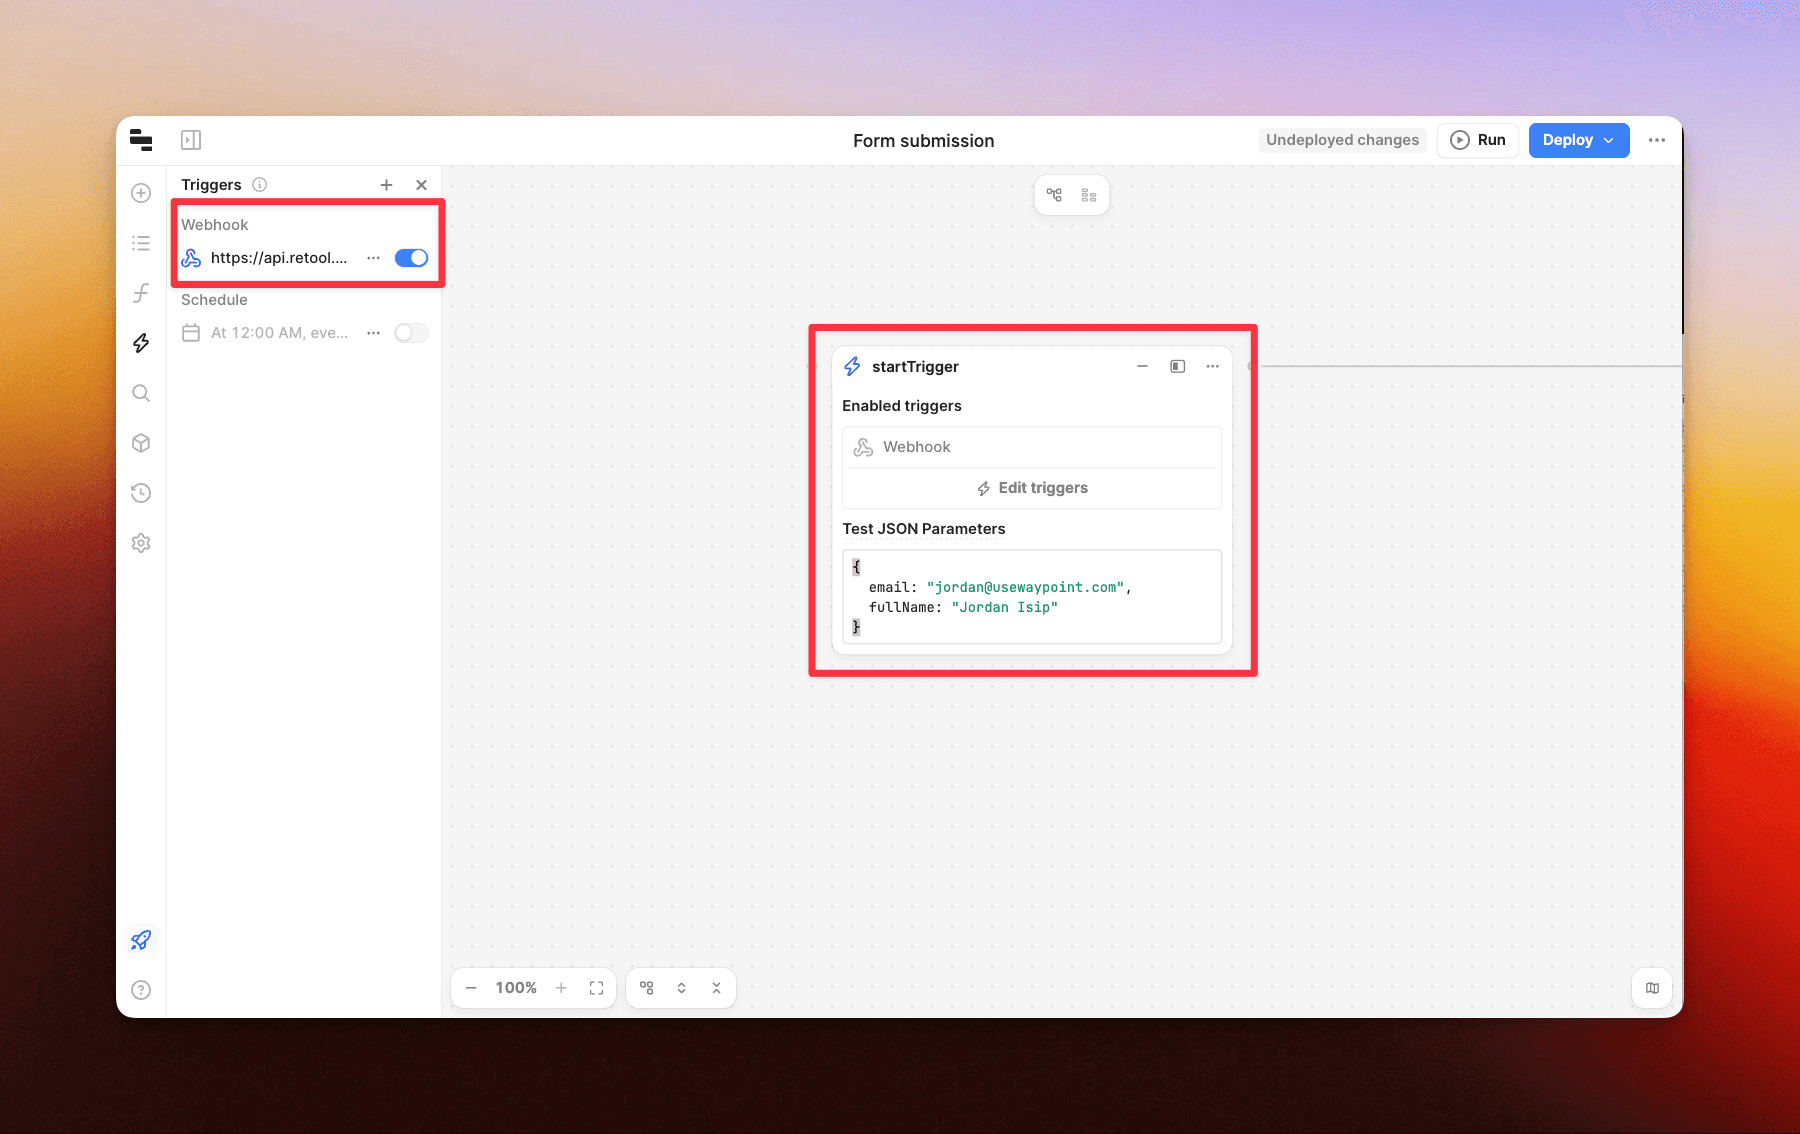
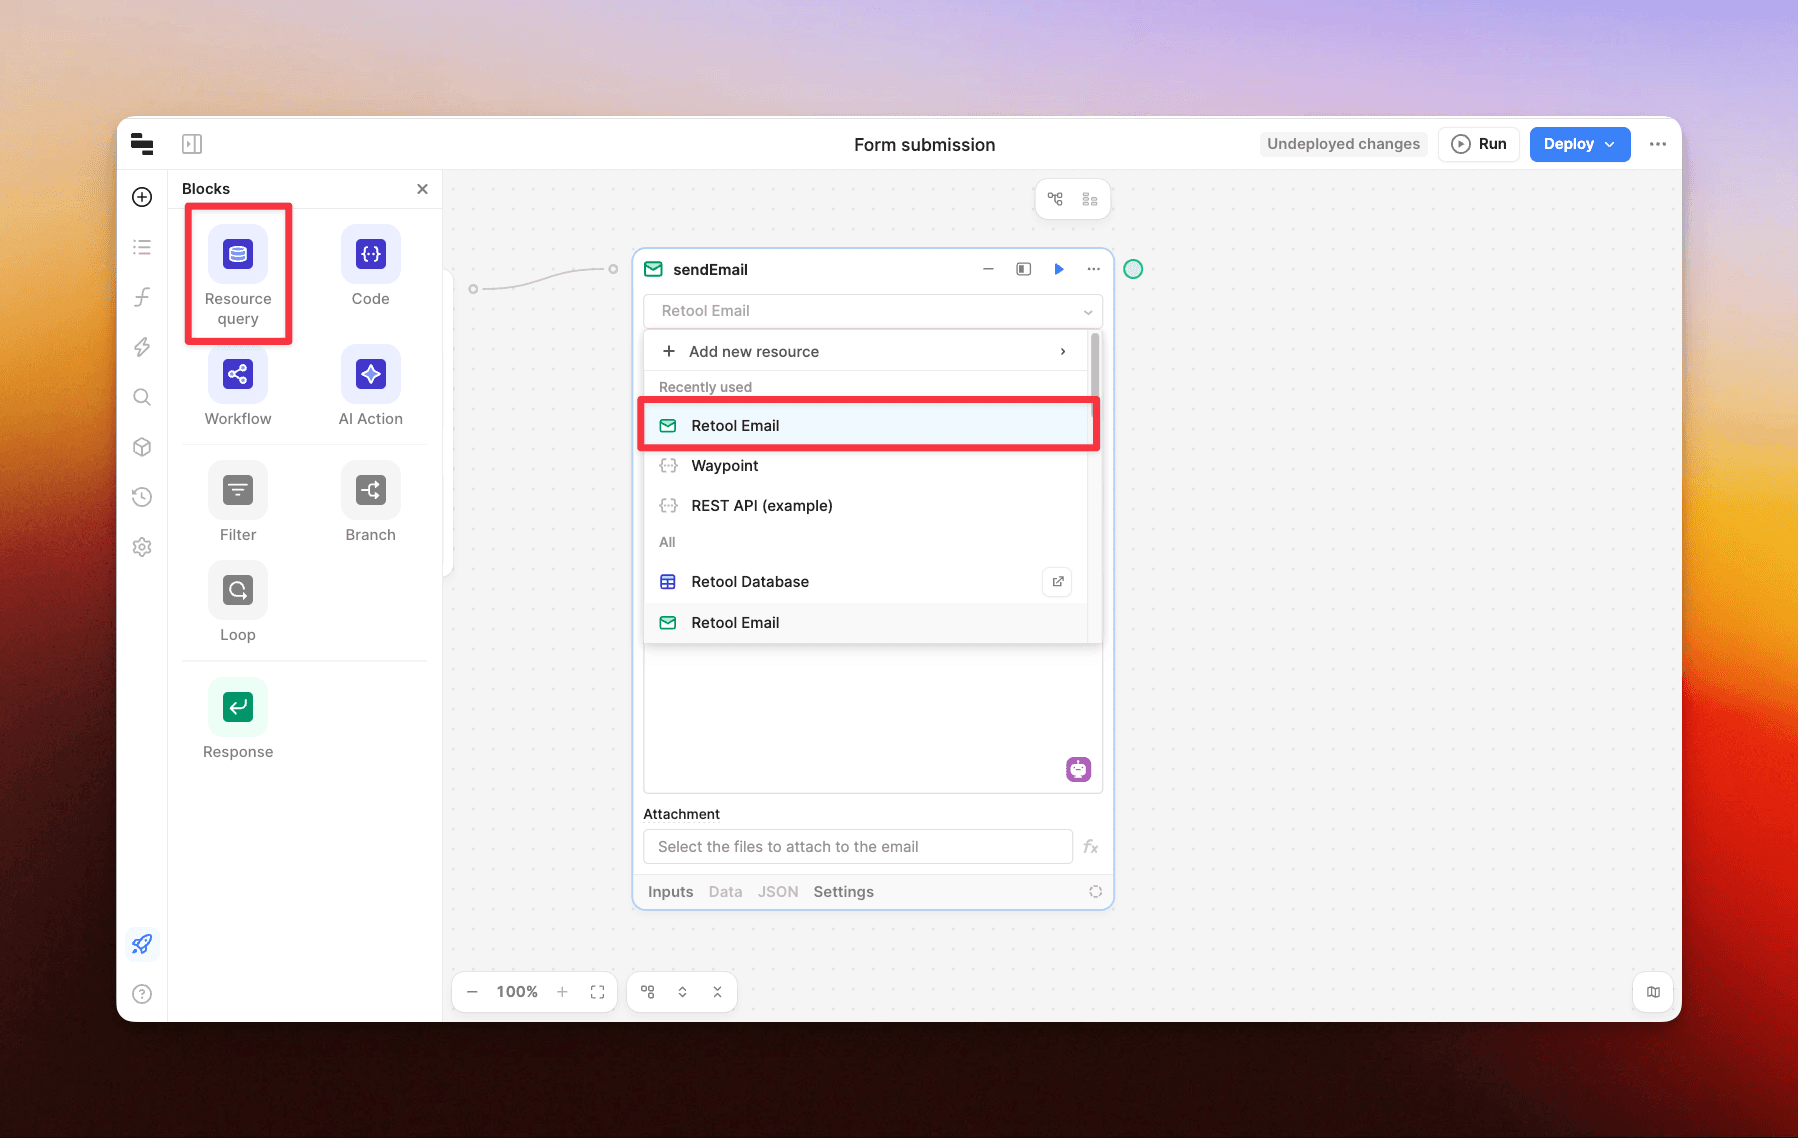
Now, we can add an 'action' step on the workflow by choosing 'Resource query' in the 'Blocks' section. After adding, change the resource in the dropdown to "Retool Email".
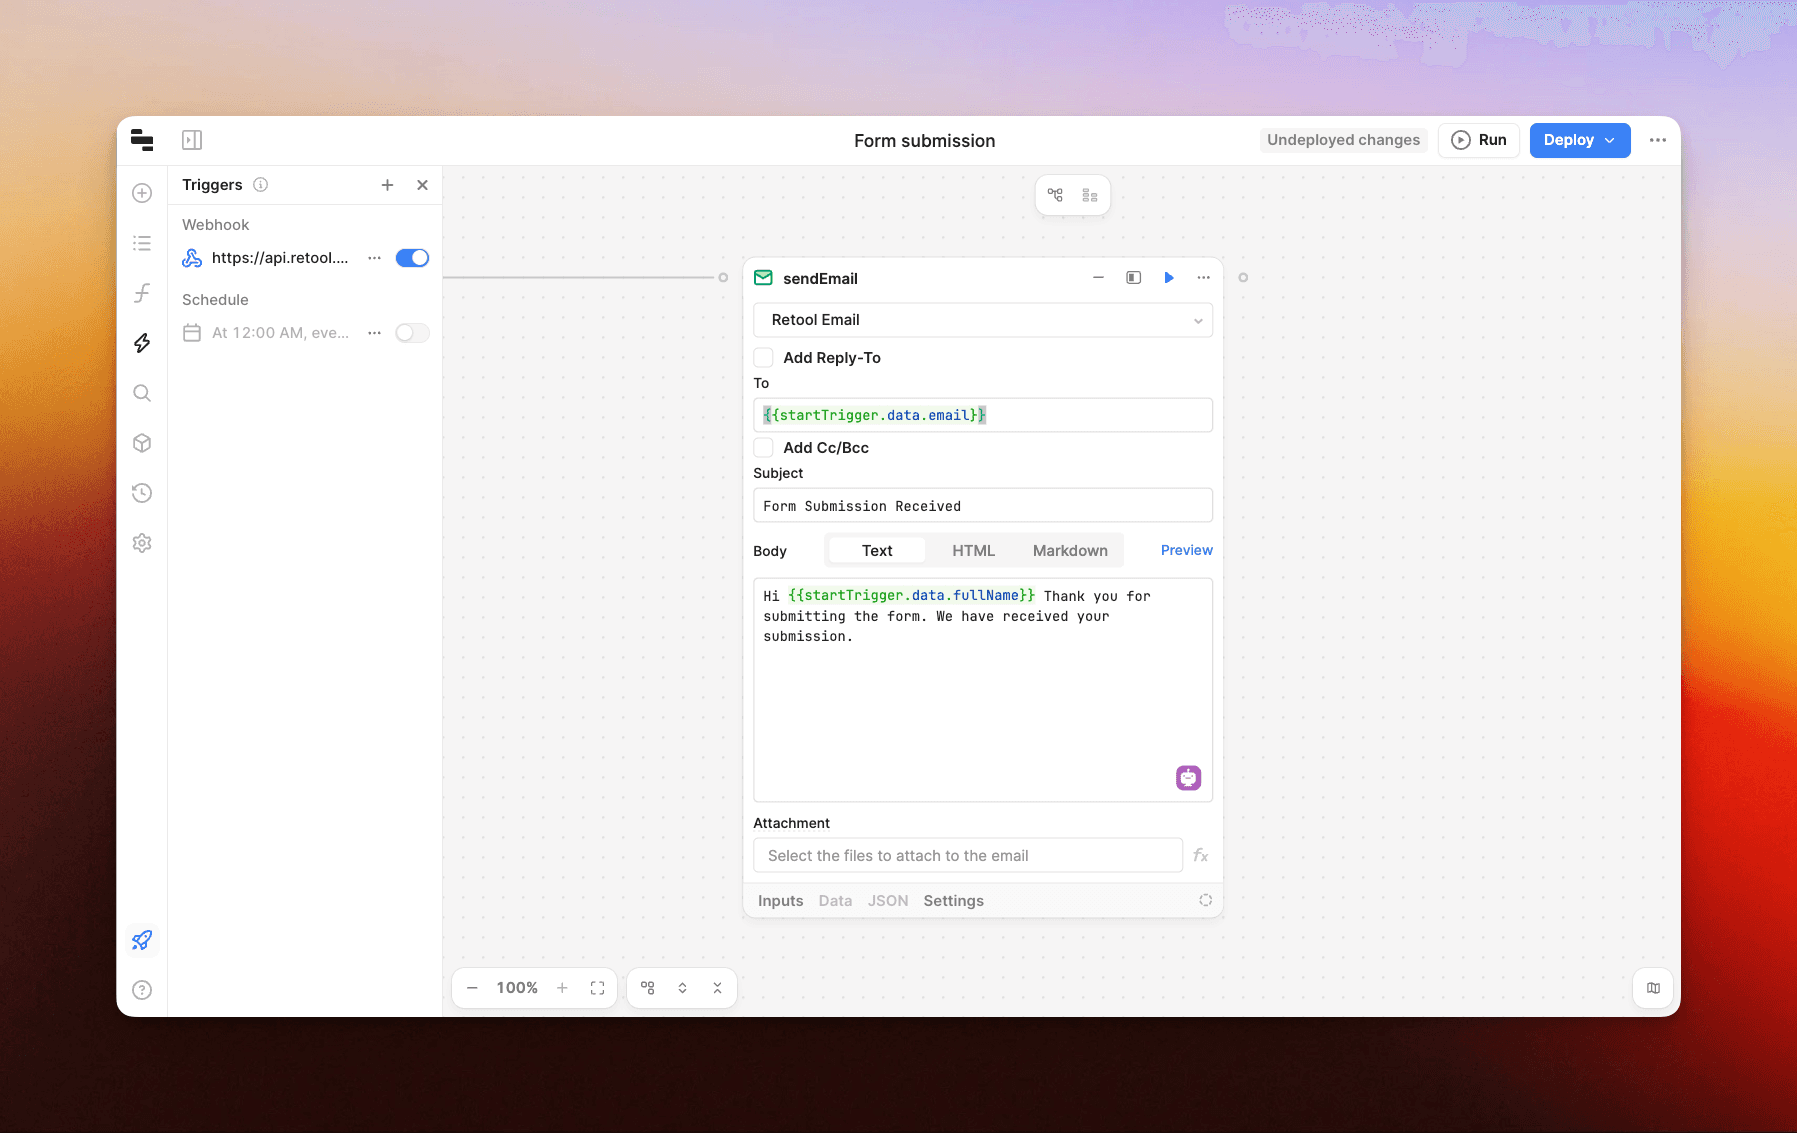
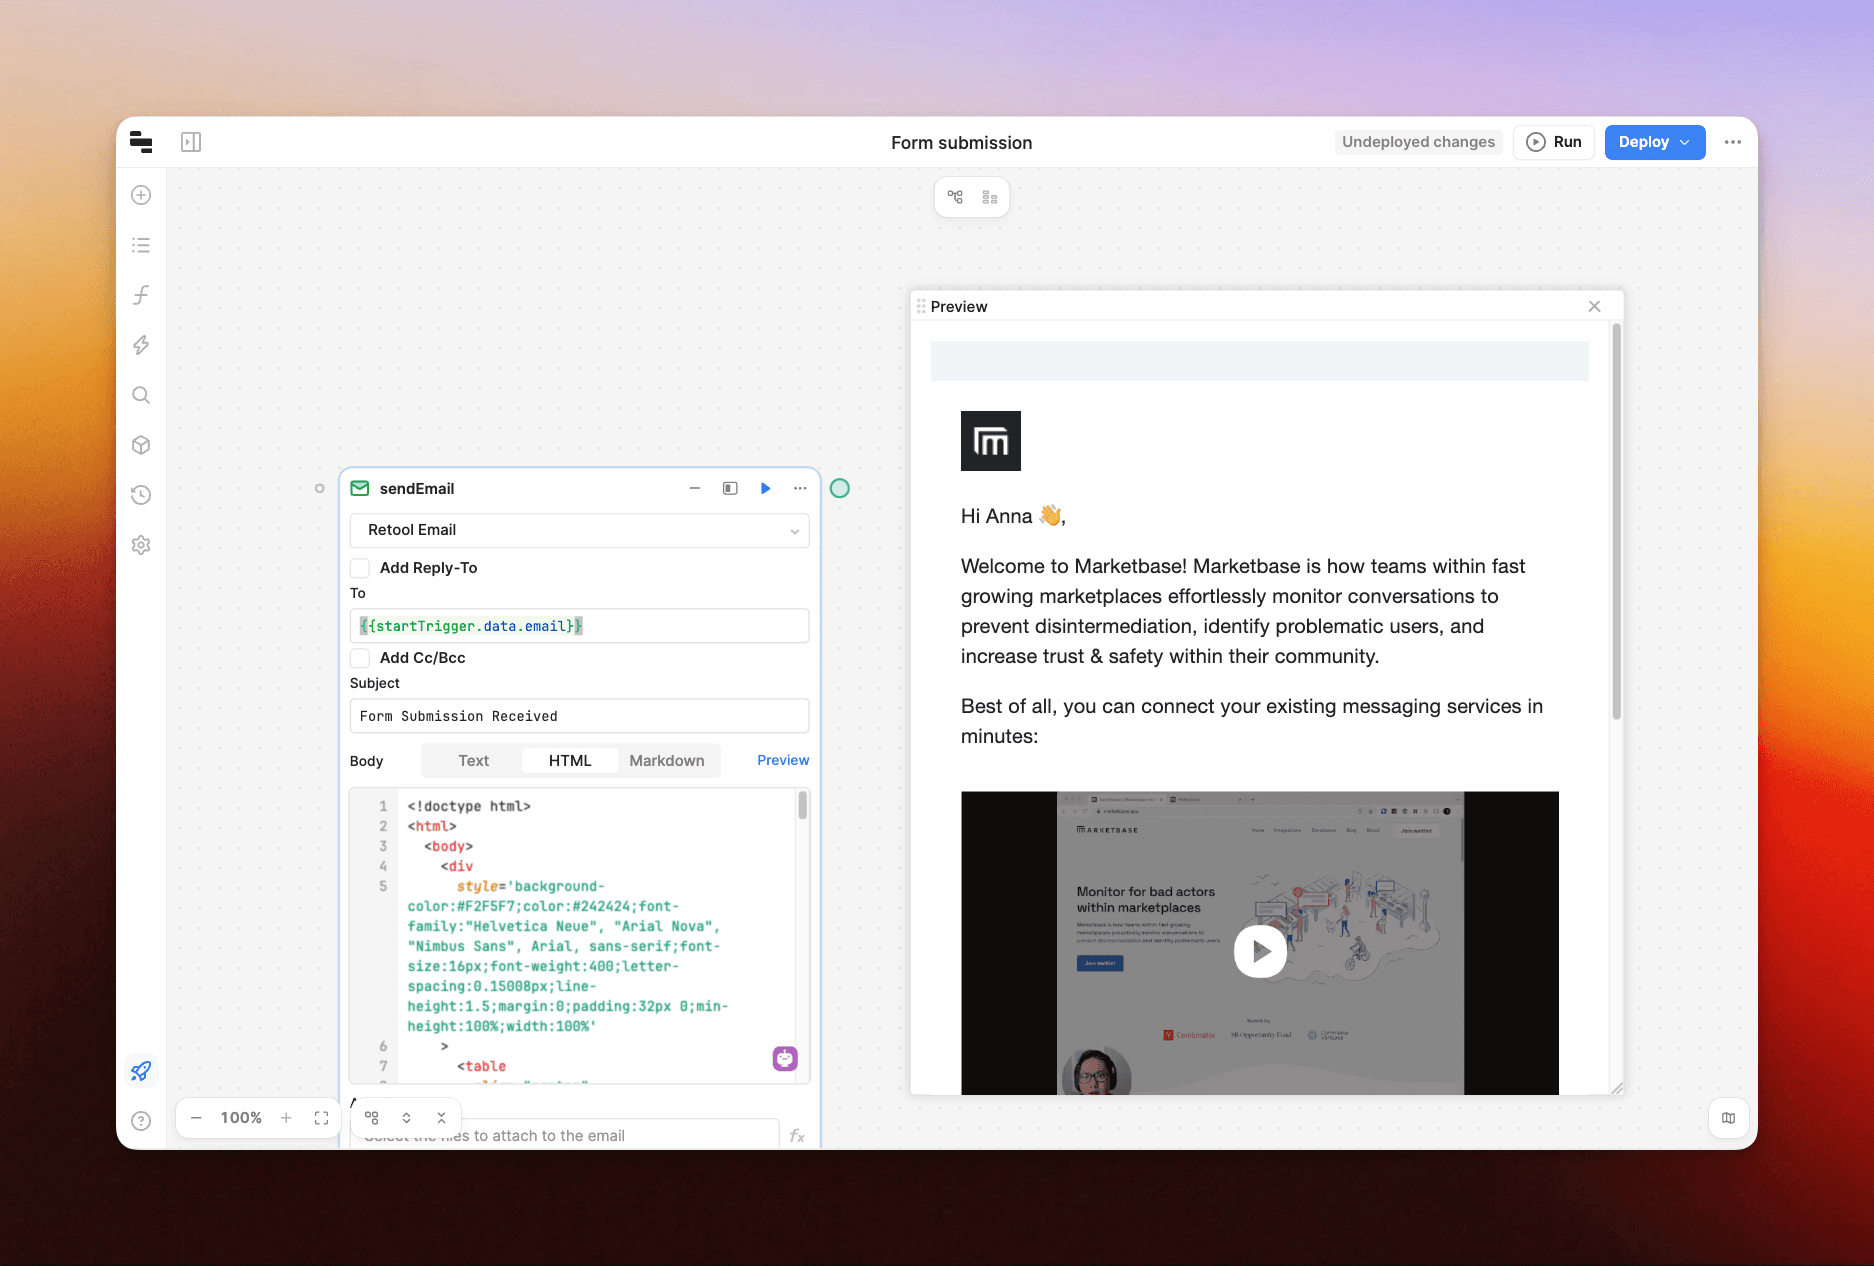
From here we can compose the email that we want to send. We can also reference the startTrigger object to access the data that is being passed into the trigger (in our case, startTrigger.data.email and startTrigger.data.fullName):
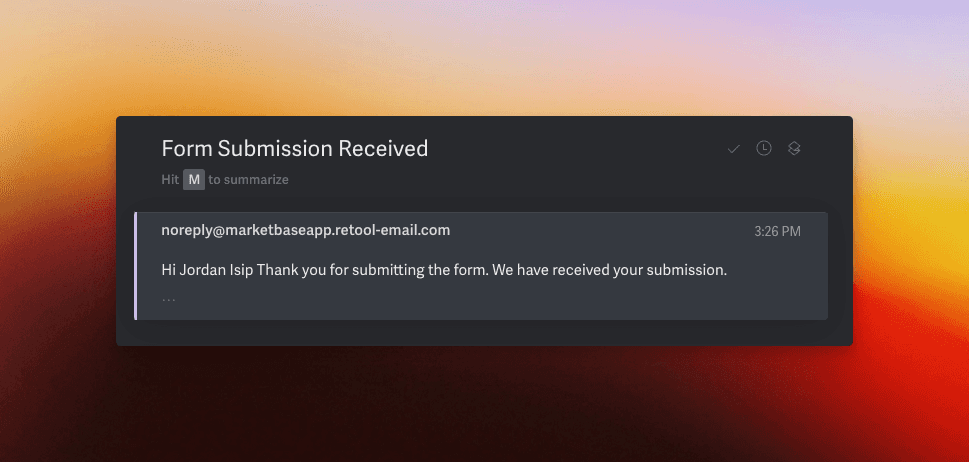
Once done setting up the email block, connect the blocks (drag and drop line connection), and then click "Run" on the workflow. This will test the workflow using the test data provided. Assuming everything goes through as expected, the following email should have been sent:
Note: this is a very basic use case of Retool Workflows. Workflows can easily be extended to setup conditionals, fetch additional data from APIs, and more.
Connecting the form and workflow
Now that we have our form and workflow working independently, it's time to connect them so that upon form submission, our data is sent to the database and our workflow.
To do this, we'll go back to our form editor and click on the workflows tab on the left and click 'Add workflow'.
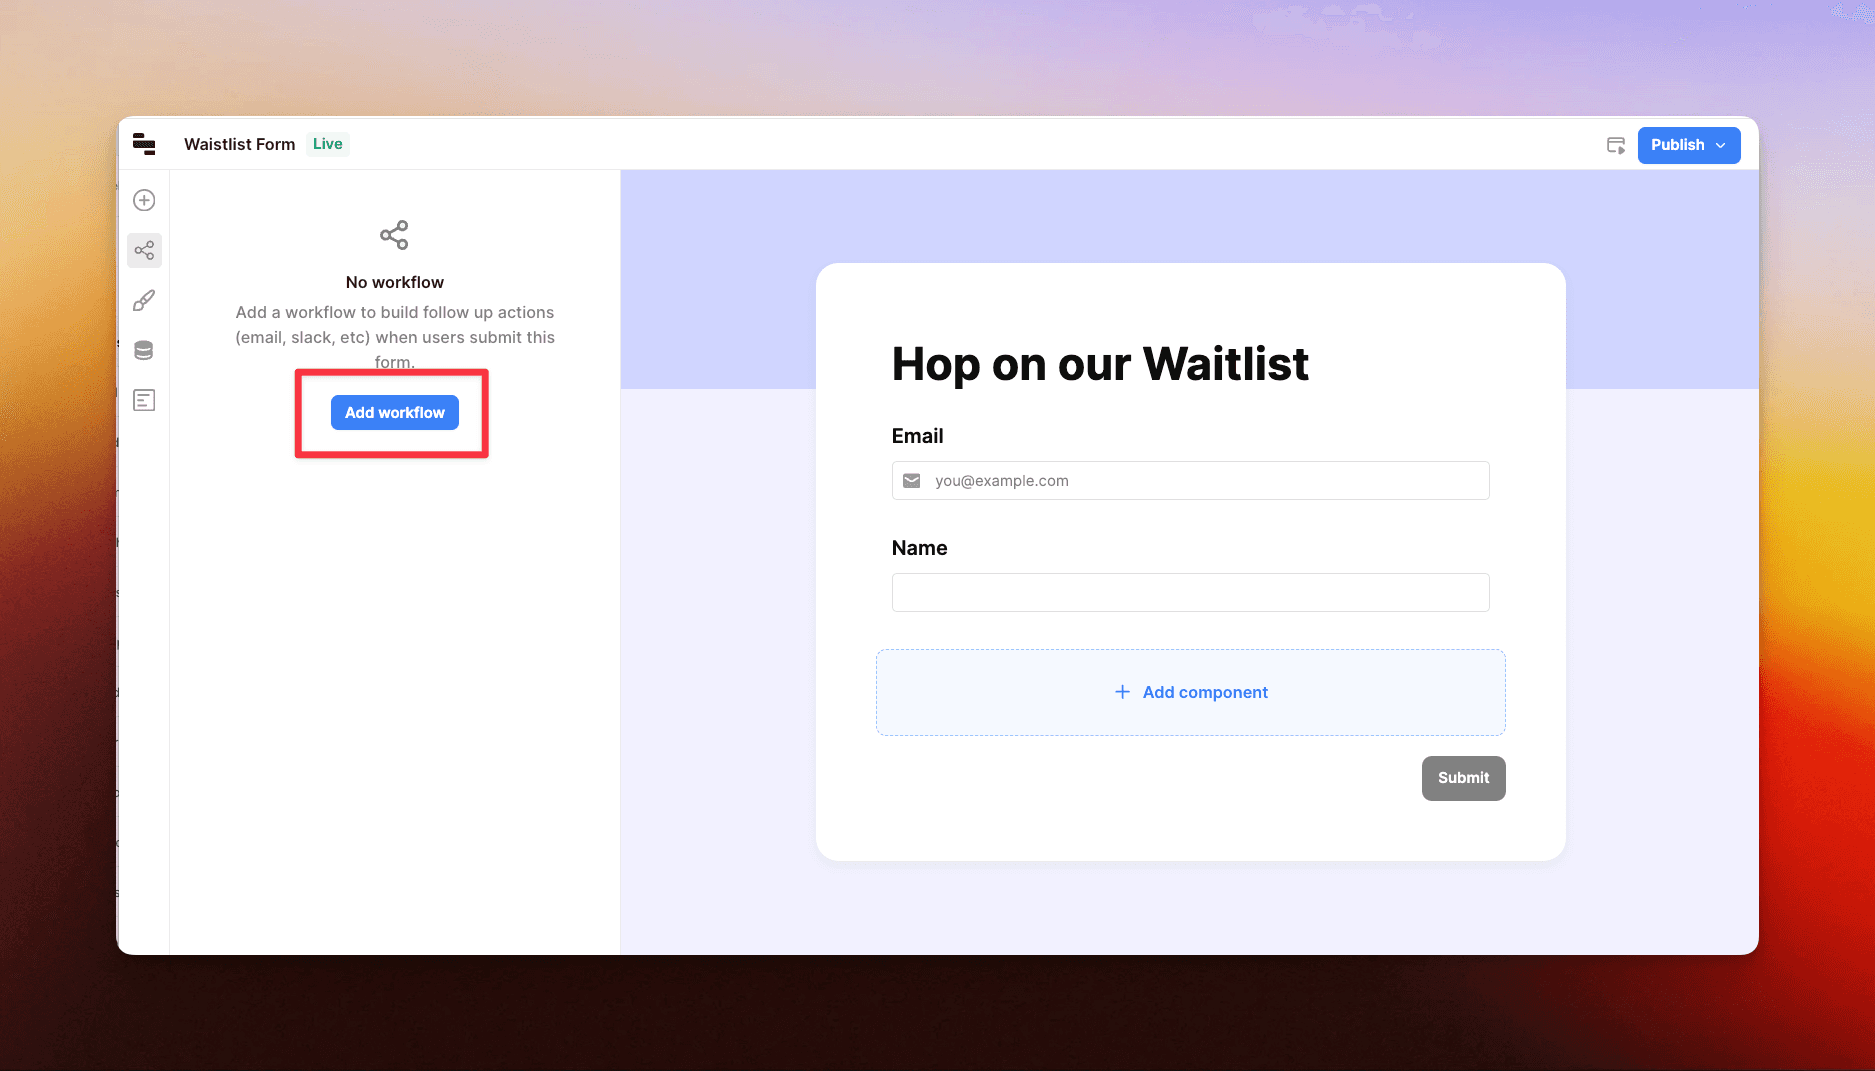
We can now select our workflow from the dropdown and ensure that our workflow parameters match what we had setup on the workflow (email and fullName).
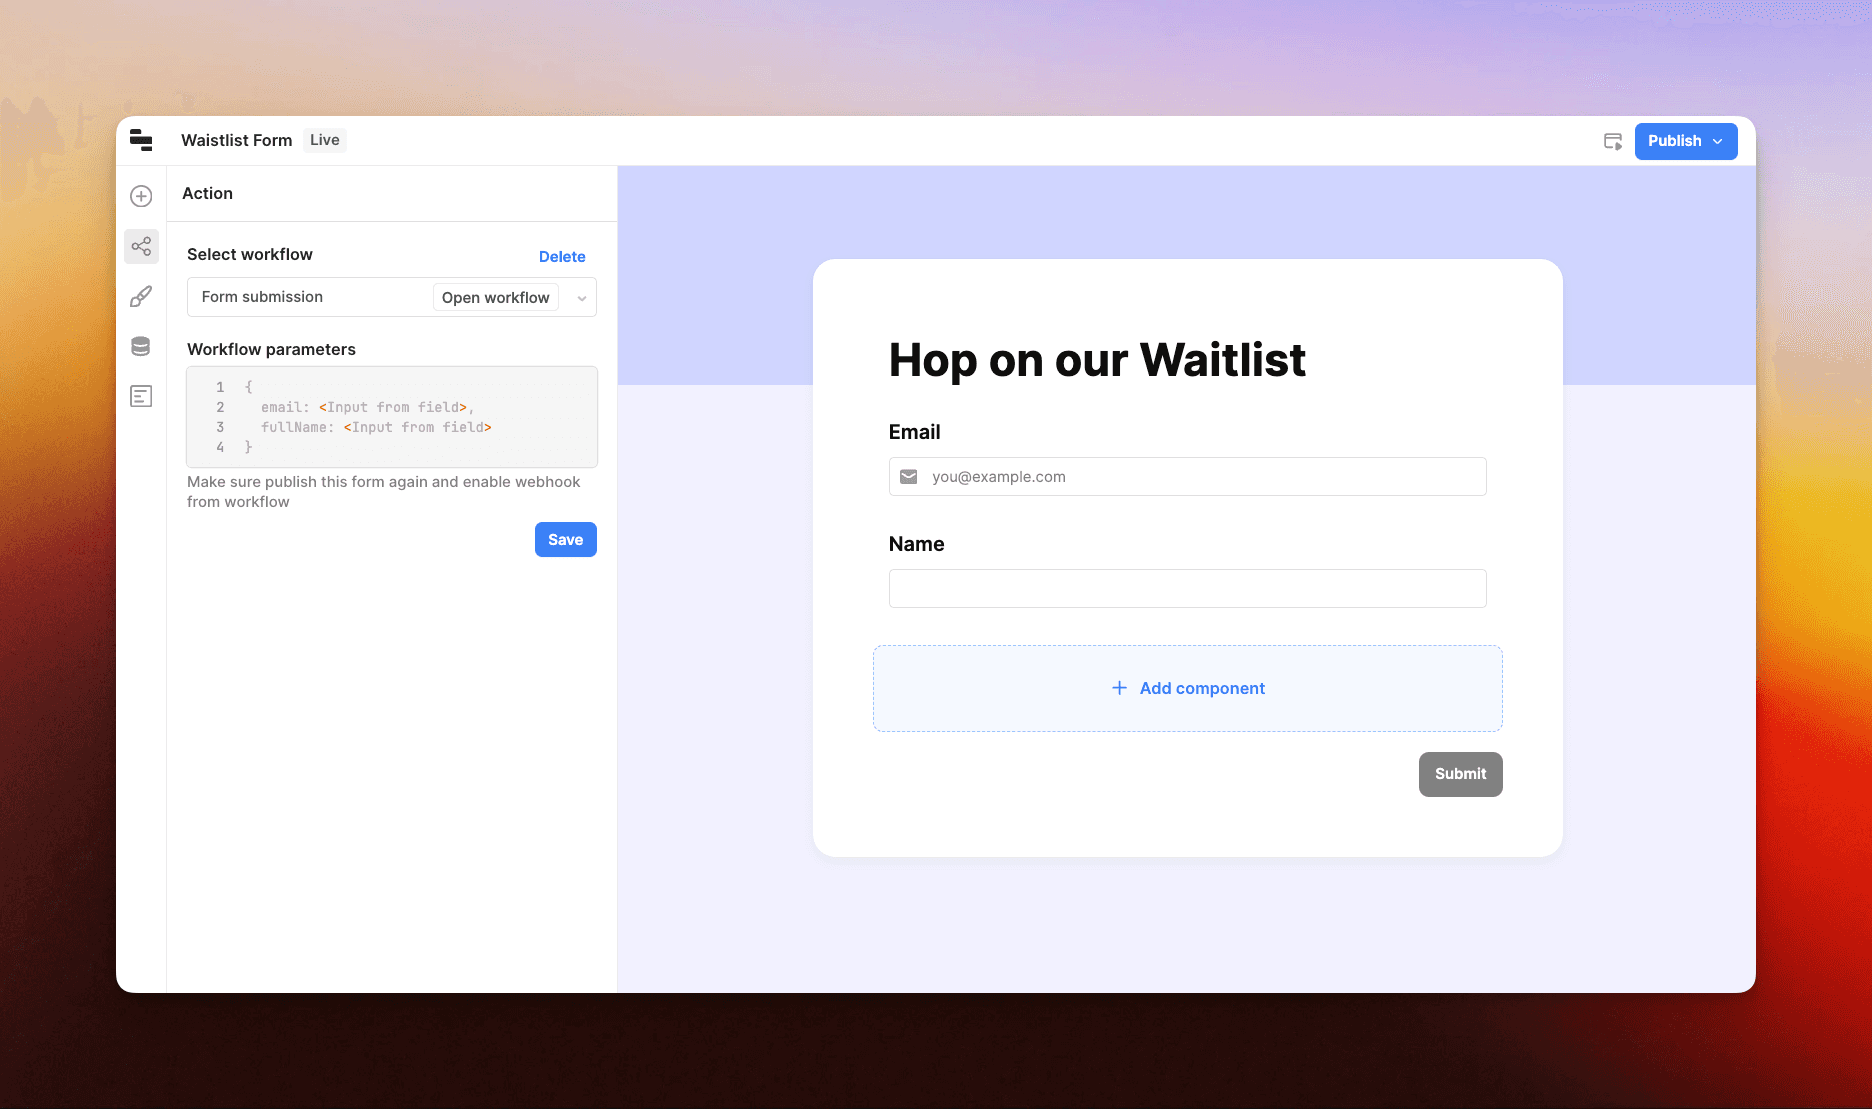
That's it! After deploying your changes (on both the form and workflow), every time our form gets a submission, our confirmation email that we setup on the workflow will be sent.

Creating branded HTML emails
Sending plain text emails are great, but what if we want to send branded HTML emails?
Fortunately, there are two great options for this:
EmailBuilder.js – copy and paste exported HTML and add variables.
Waypoint – pass the data to an email API with a visual template builder.
Option 1: EmailBuilder.js
EmailBuilder.js is our free and open-source email template builder with a hosted playground that can easily export HTML.
This means, we can visually build a template like the one below:
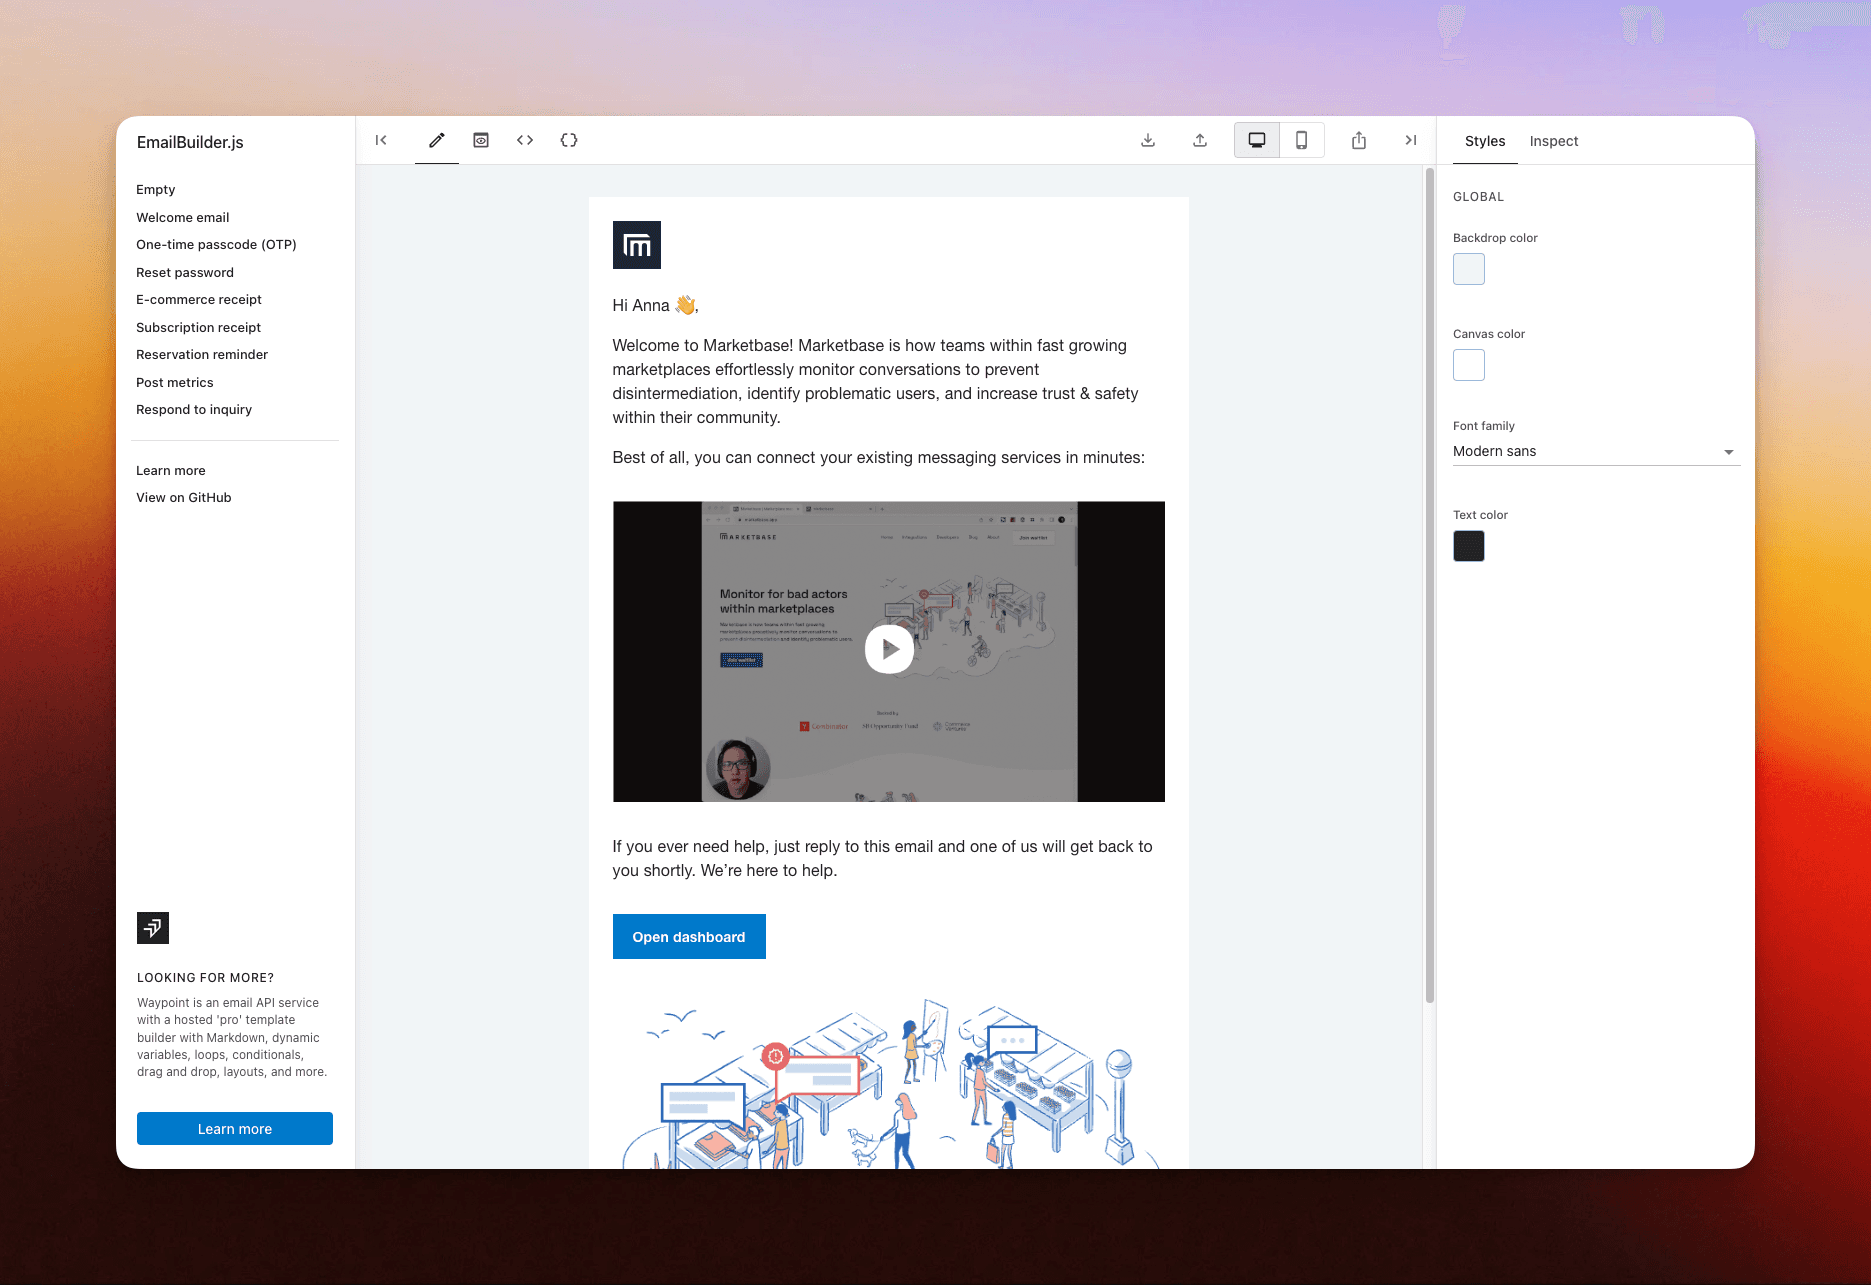
And then grab the HTML to copy and paste back into Retool. Simply switch the tab in the 'sendEmail' action from "Text" to "HTML" and then setup variables as needed.
Option 2: Waypoint
If you are looking for more flexibility and power (sending emails from a custom domain, a more powerful builder, and great logs), Waypoint is a great way to extend Retool.
Within Retool Workflows, we can modify our workflow to pass data through to Waypoint and then reference variables from Waypoint's template builder:
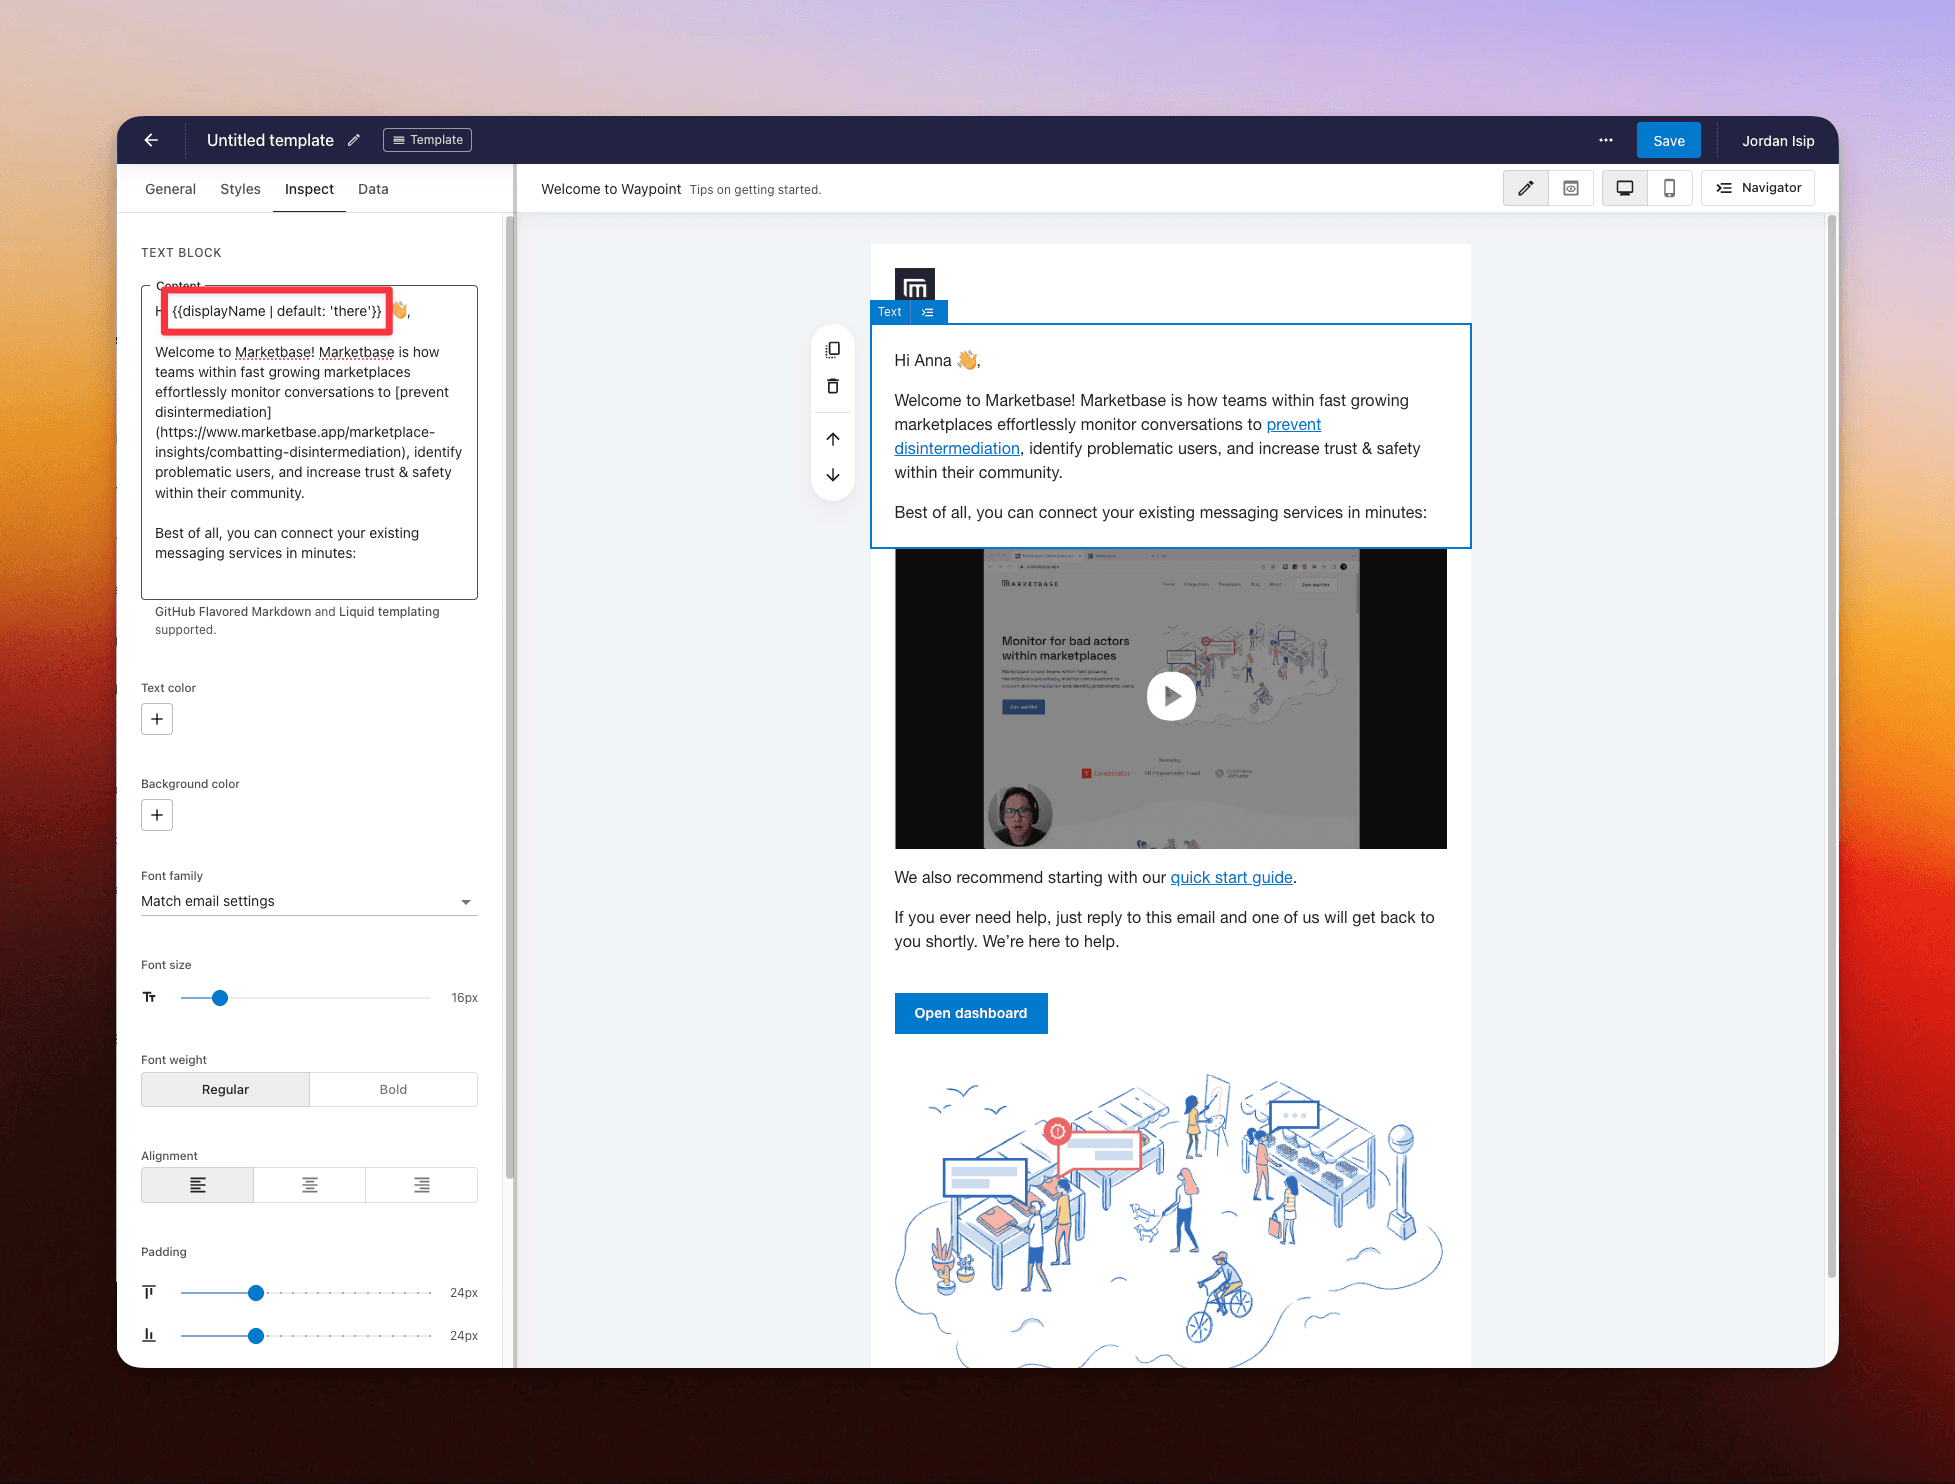
To learn more on getting started with Waypoint, check out our quick start guide.
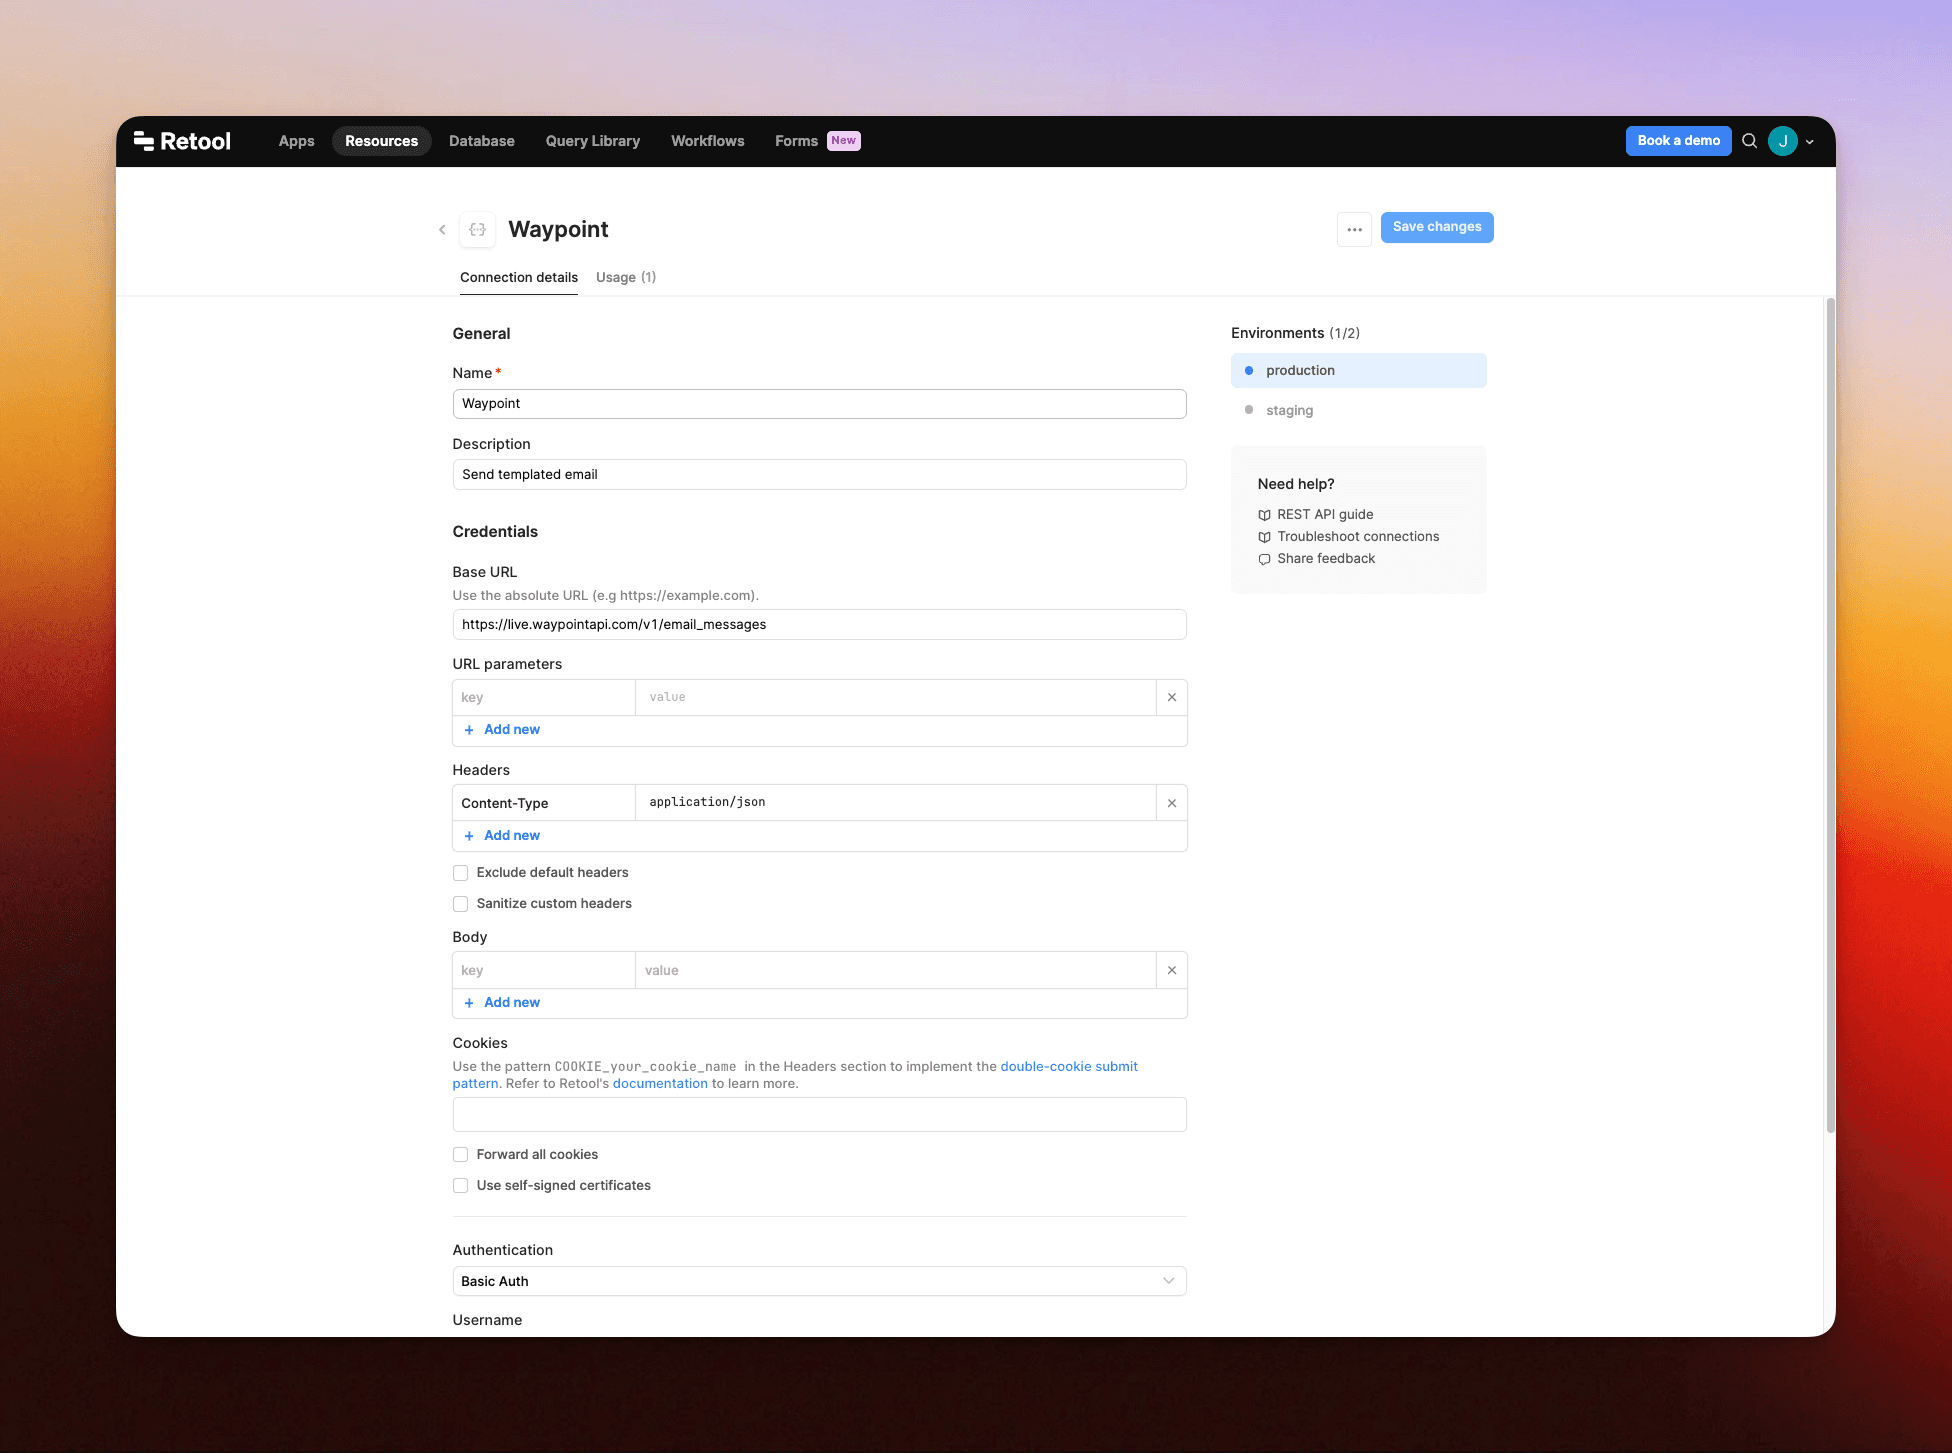
To setup Retool Workflows to pass data to Waypoint, we'll want to first create a new resource on Retool.
Name: Waypoint
Description: Send templated email
Base URL: https://live.waypointapi.com/v1/email_messages
Headers: Content Type | application/json
Authentication: Basic Auth
Username: [Waypoint API key username]
Password: [Waypoint API key password]
With the Resource setup, we can now add a new 'Resource Query' and set the resource to our new 'Waypoint' resource. Within the 'body', we'll reference our templateId, to, and variables (displayName) to map the variables on Retool to the variables expected on the Waypoint API call.
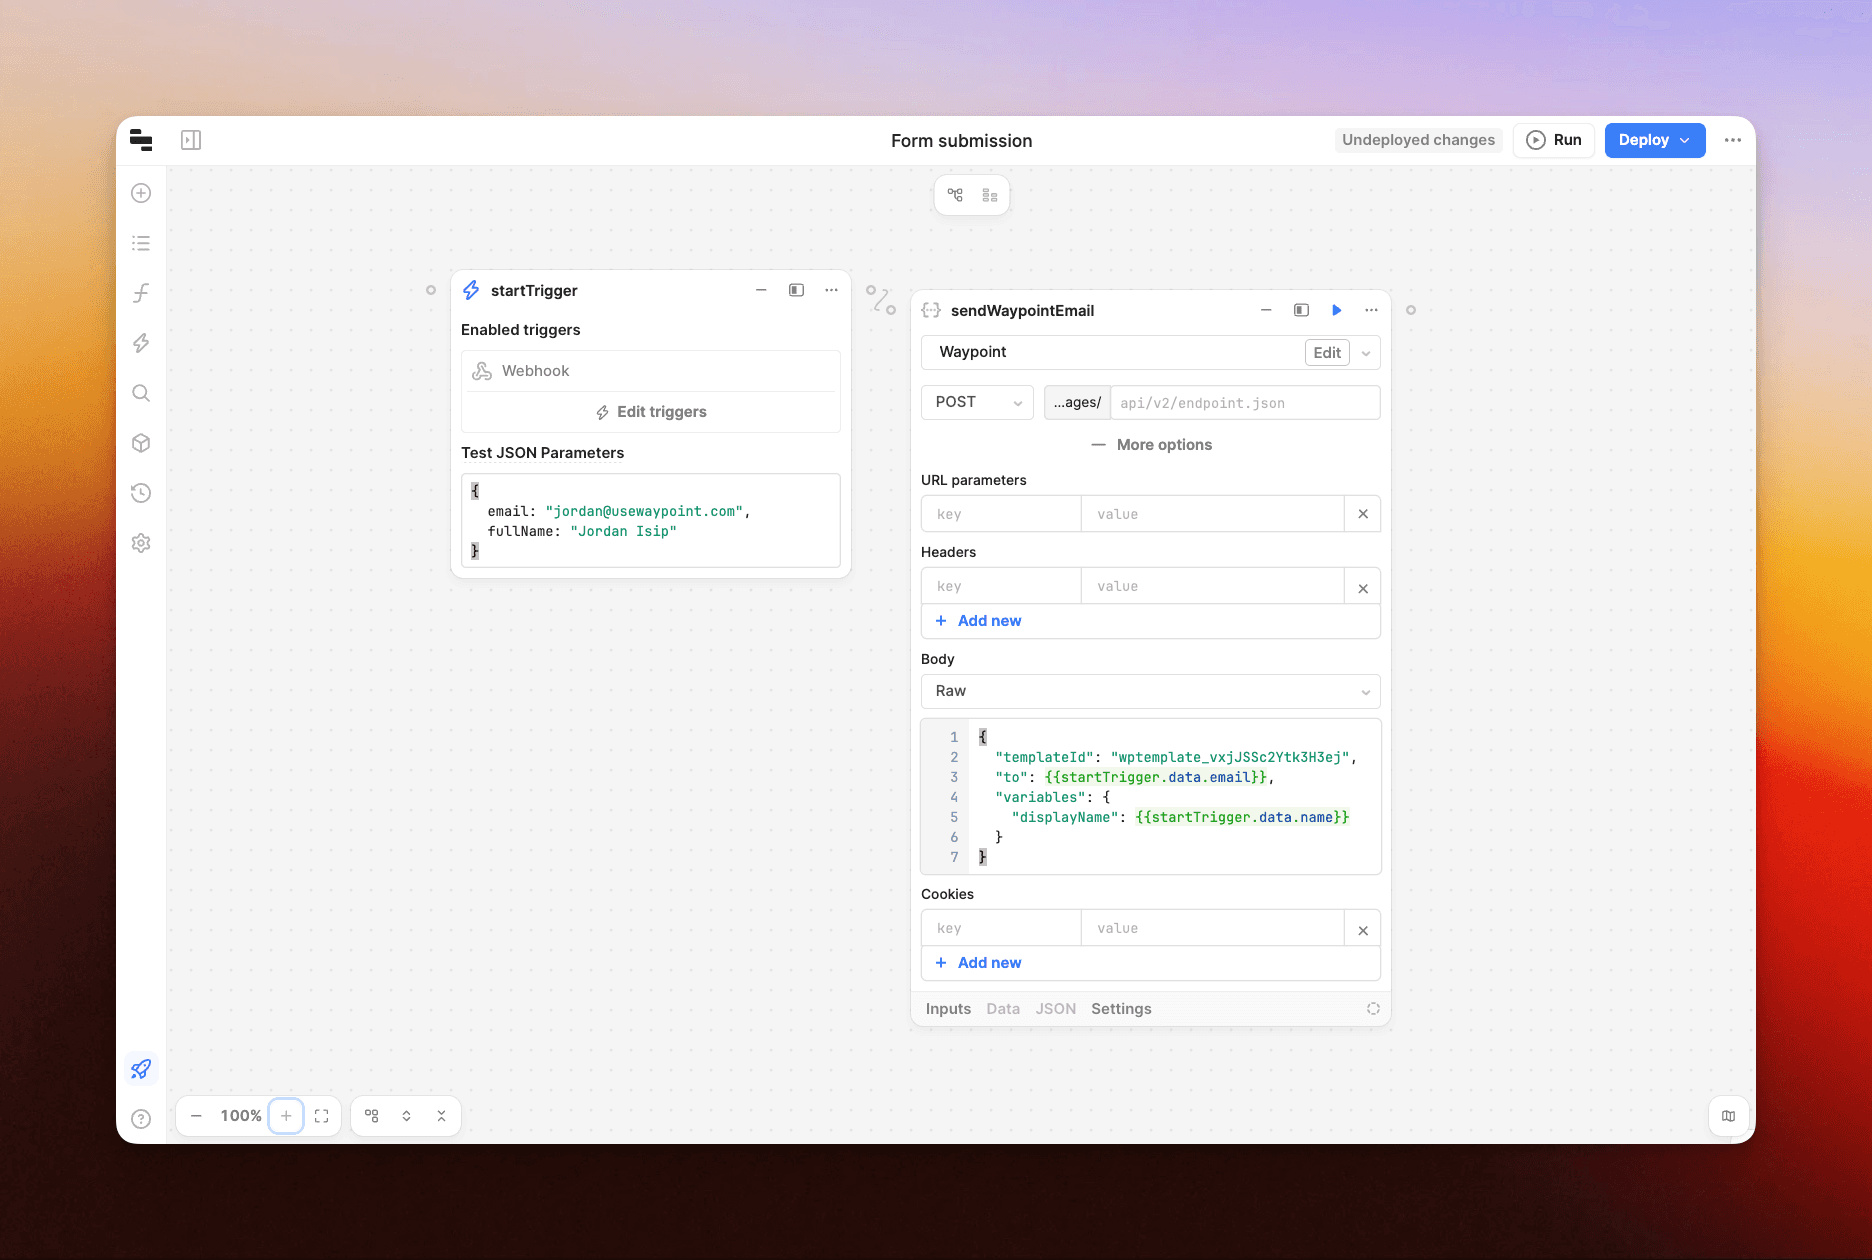
After connecting the trigger and Waypoint block (using the drag and drop connector), click 'Run' to test out the workflow.
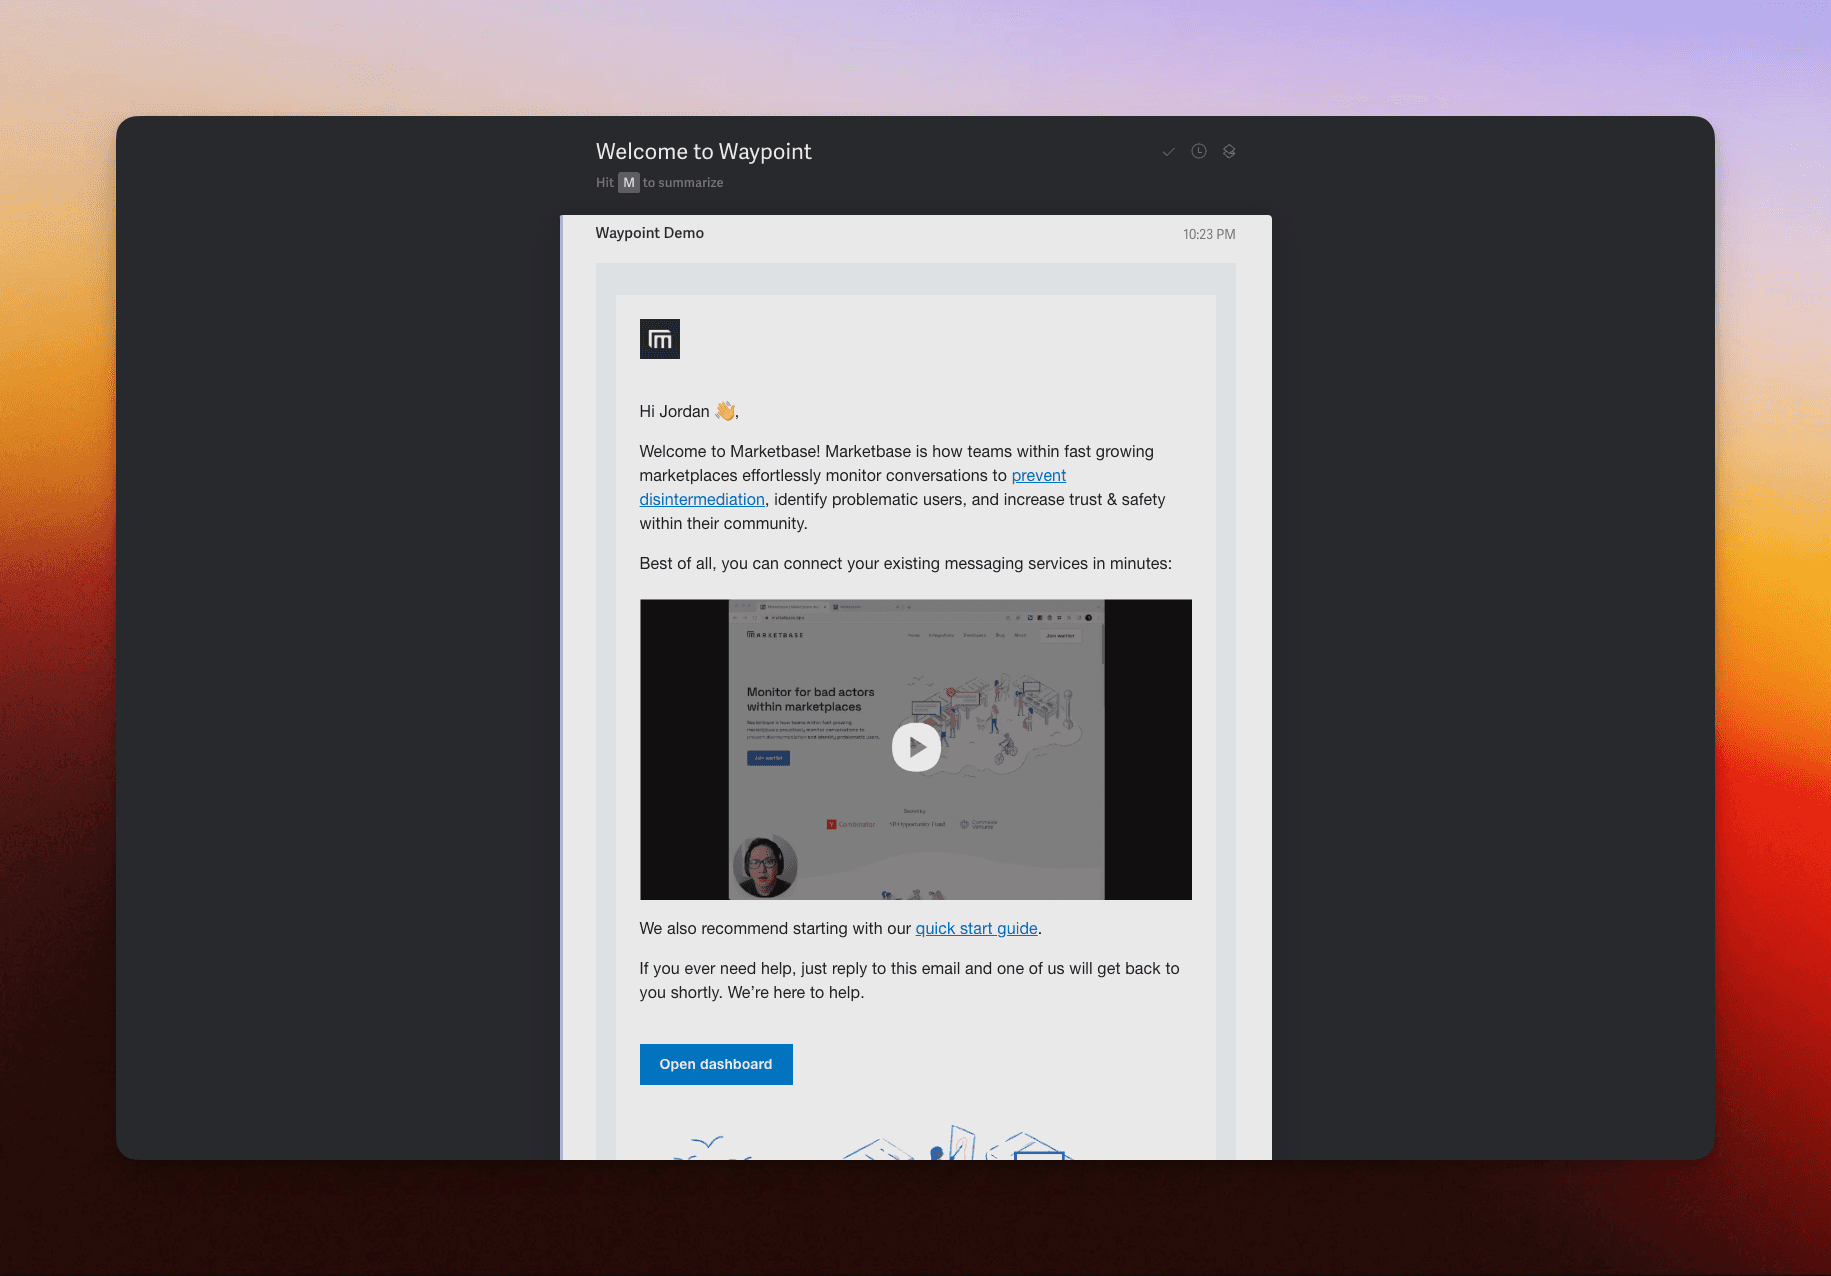
The email should be sent through workflow with the data passed from the form through the workflow and then to Waypoint:
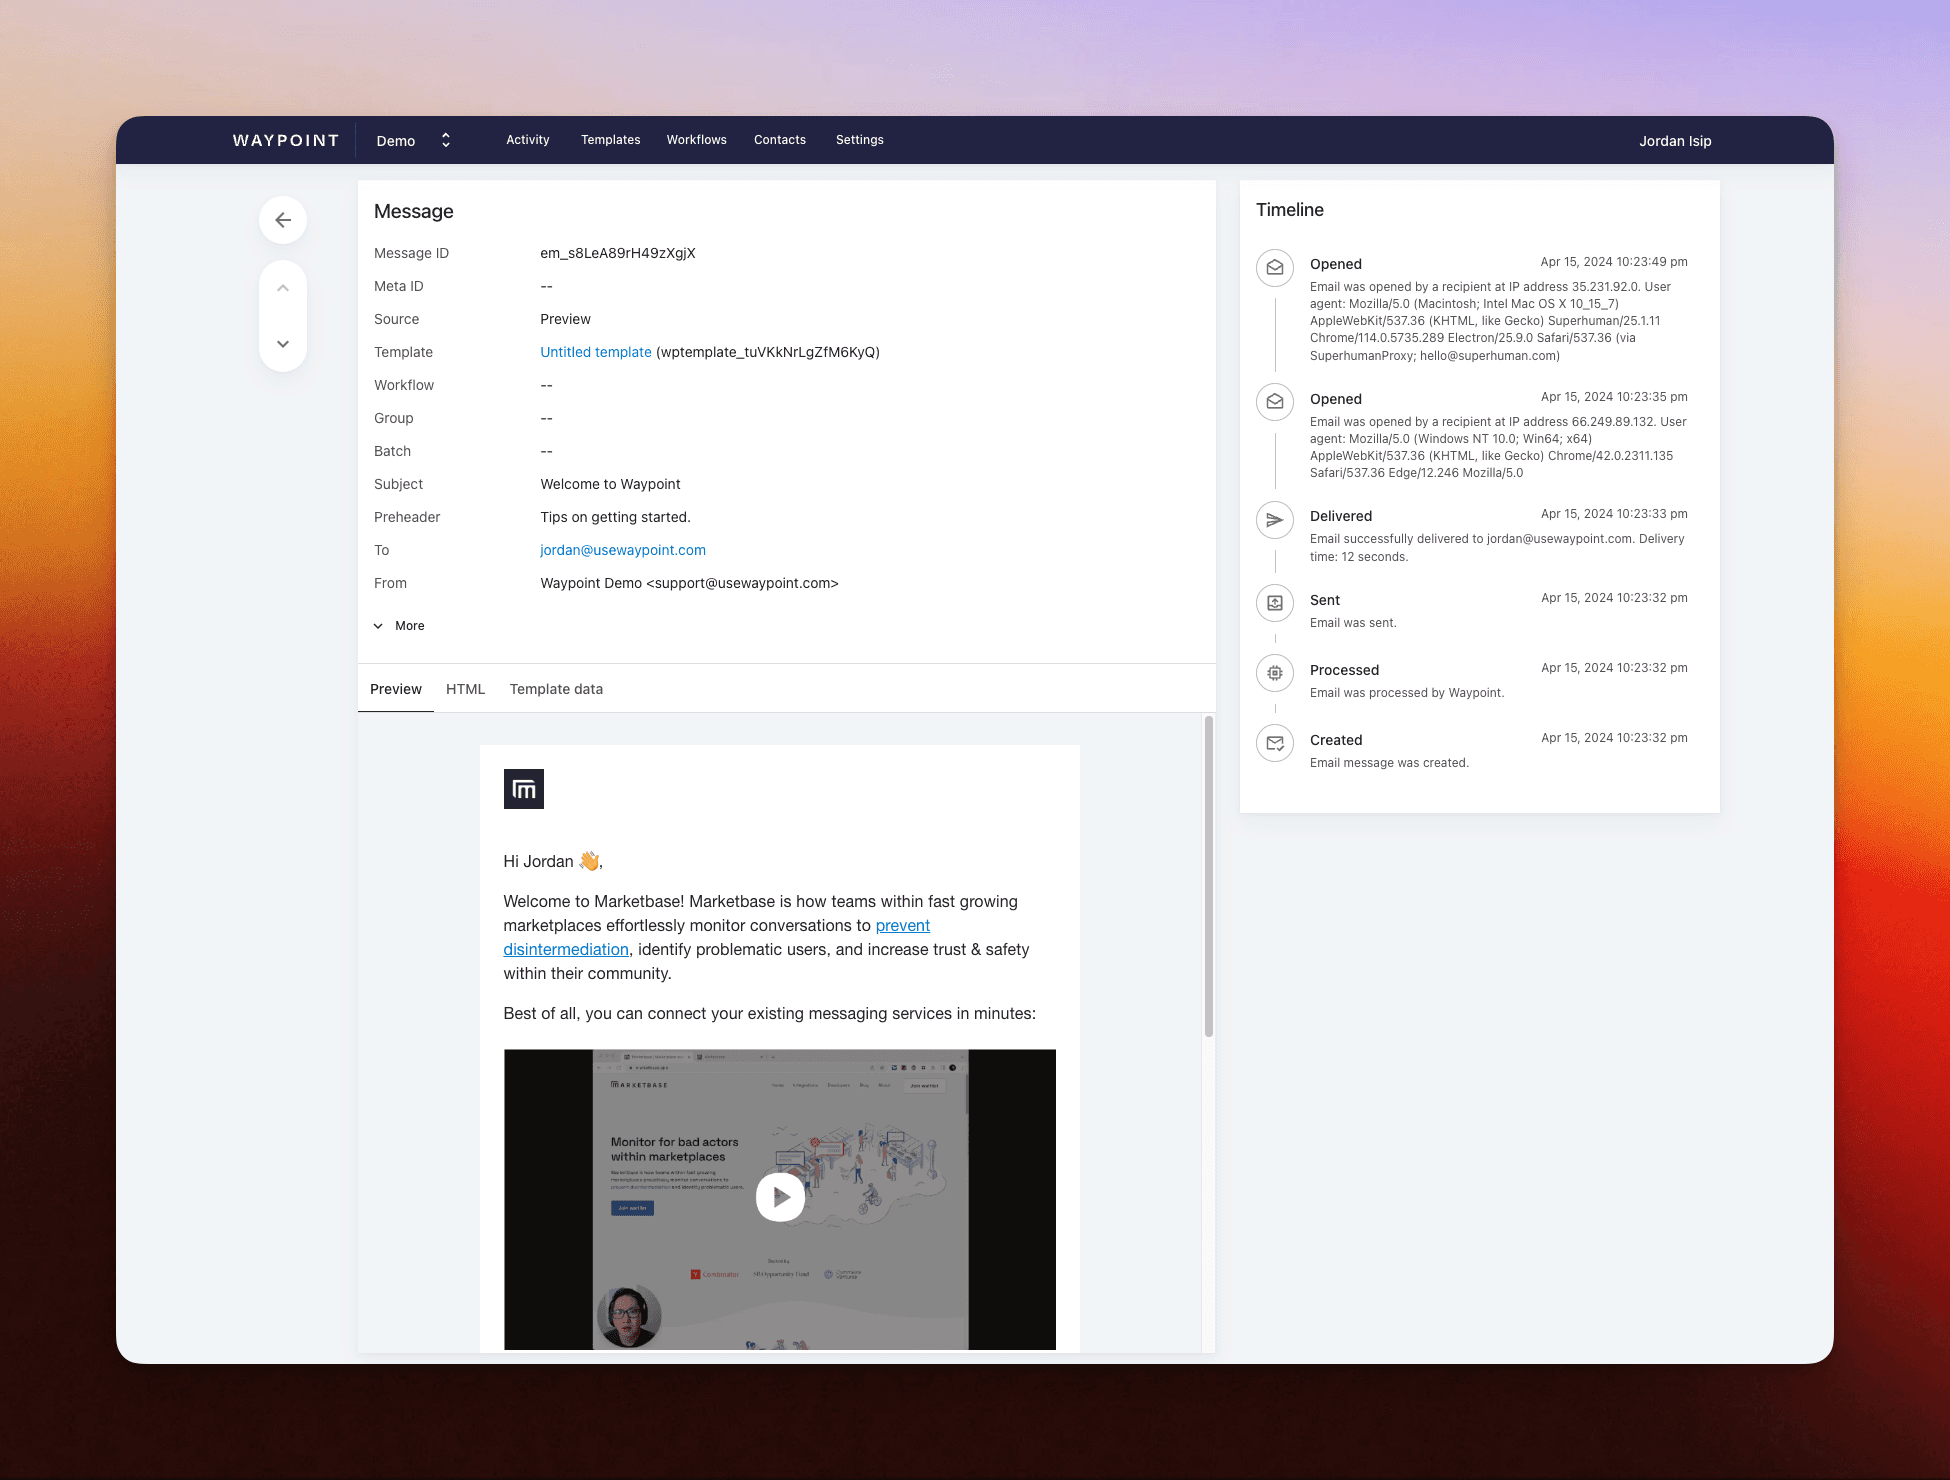
Additionally, the email log will be available on Waypoint to track the full raw email, all of the metadata, and the timeline of email events (opens, bounces, clicks, etc).
Once ready, deploy the updated workflow. All new form submissions will have corresponding emails sent and tracked through Waypoint.
Wrap up
Retool's no-code platform is a fantastic way for teams to quickly spin up web forms to capture data from users. By pairing Retool Forms with Retool Workflows, teams can orchestrate user communication related to the form submissions. Teams can take email communication even further by passing form/workflow data to Waypoint's email API with a powerful template builder.
