Jun 28, 2023
Overview
Bubble is powerful no-code platform that makes it possible for teams to create fully functioning web applications with backend logic, databases, and workflows.
While Bubble has basic tools for sending plain text emails (view Bubble docs), companies often want to send more visually appealing and/or better structured emails to their customers. This could be for simple brand recognition to data rich revenue generating opportunities like product recommendations and upsells that require more involved layouts (eg. product recommendations).
This is where Waypoint comes in. Waypoint is a platform that helps software teams build dynamic email templates (without code), connect it to applications via an API, deliver emails reliably, and monitor emails as they go out.
Worth noting, Bubble has a built-in integration with SendGrid for sending email actions. However, this 'managed' integration is quite limited so Bubble encourages customers to create their own SendGrid account for additional flexibility, improved monitoring, or sending with more volume. Waypoint is a SendGrid alternative but designed specifically for transactional emails with a powerful no-code template builder and great observability. Read a more detailed comparison between SendGrid vs Waypoint.
At Waypoint, we’ve noticed a growing number of our customers (and potential customers) that are using Bubble – especially as an MVP (minimum viable product) solution to help test their market with a new idea. This is why we put together this step-by-step guide to help Bubble users start sending branded HTML emails with Waypoint.
Context
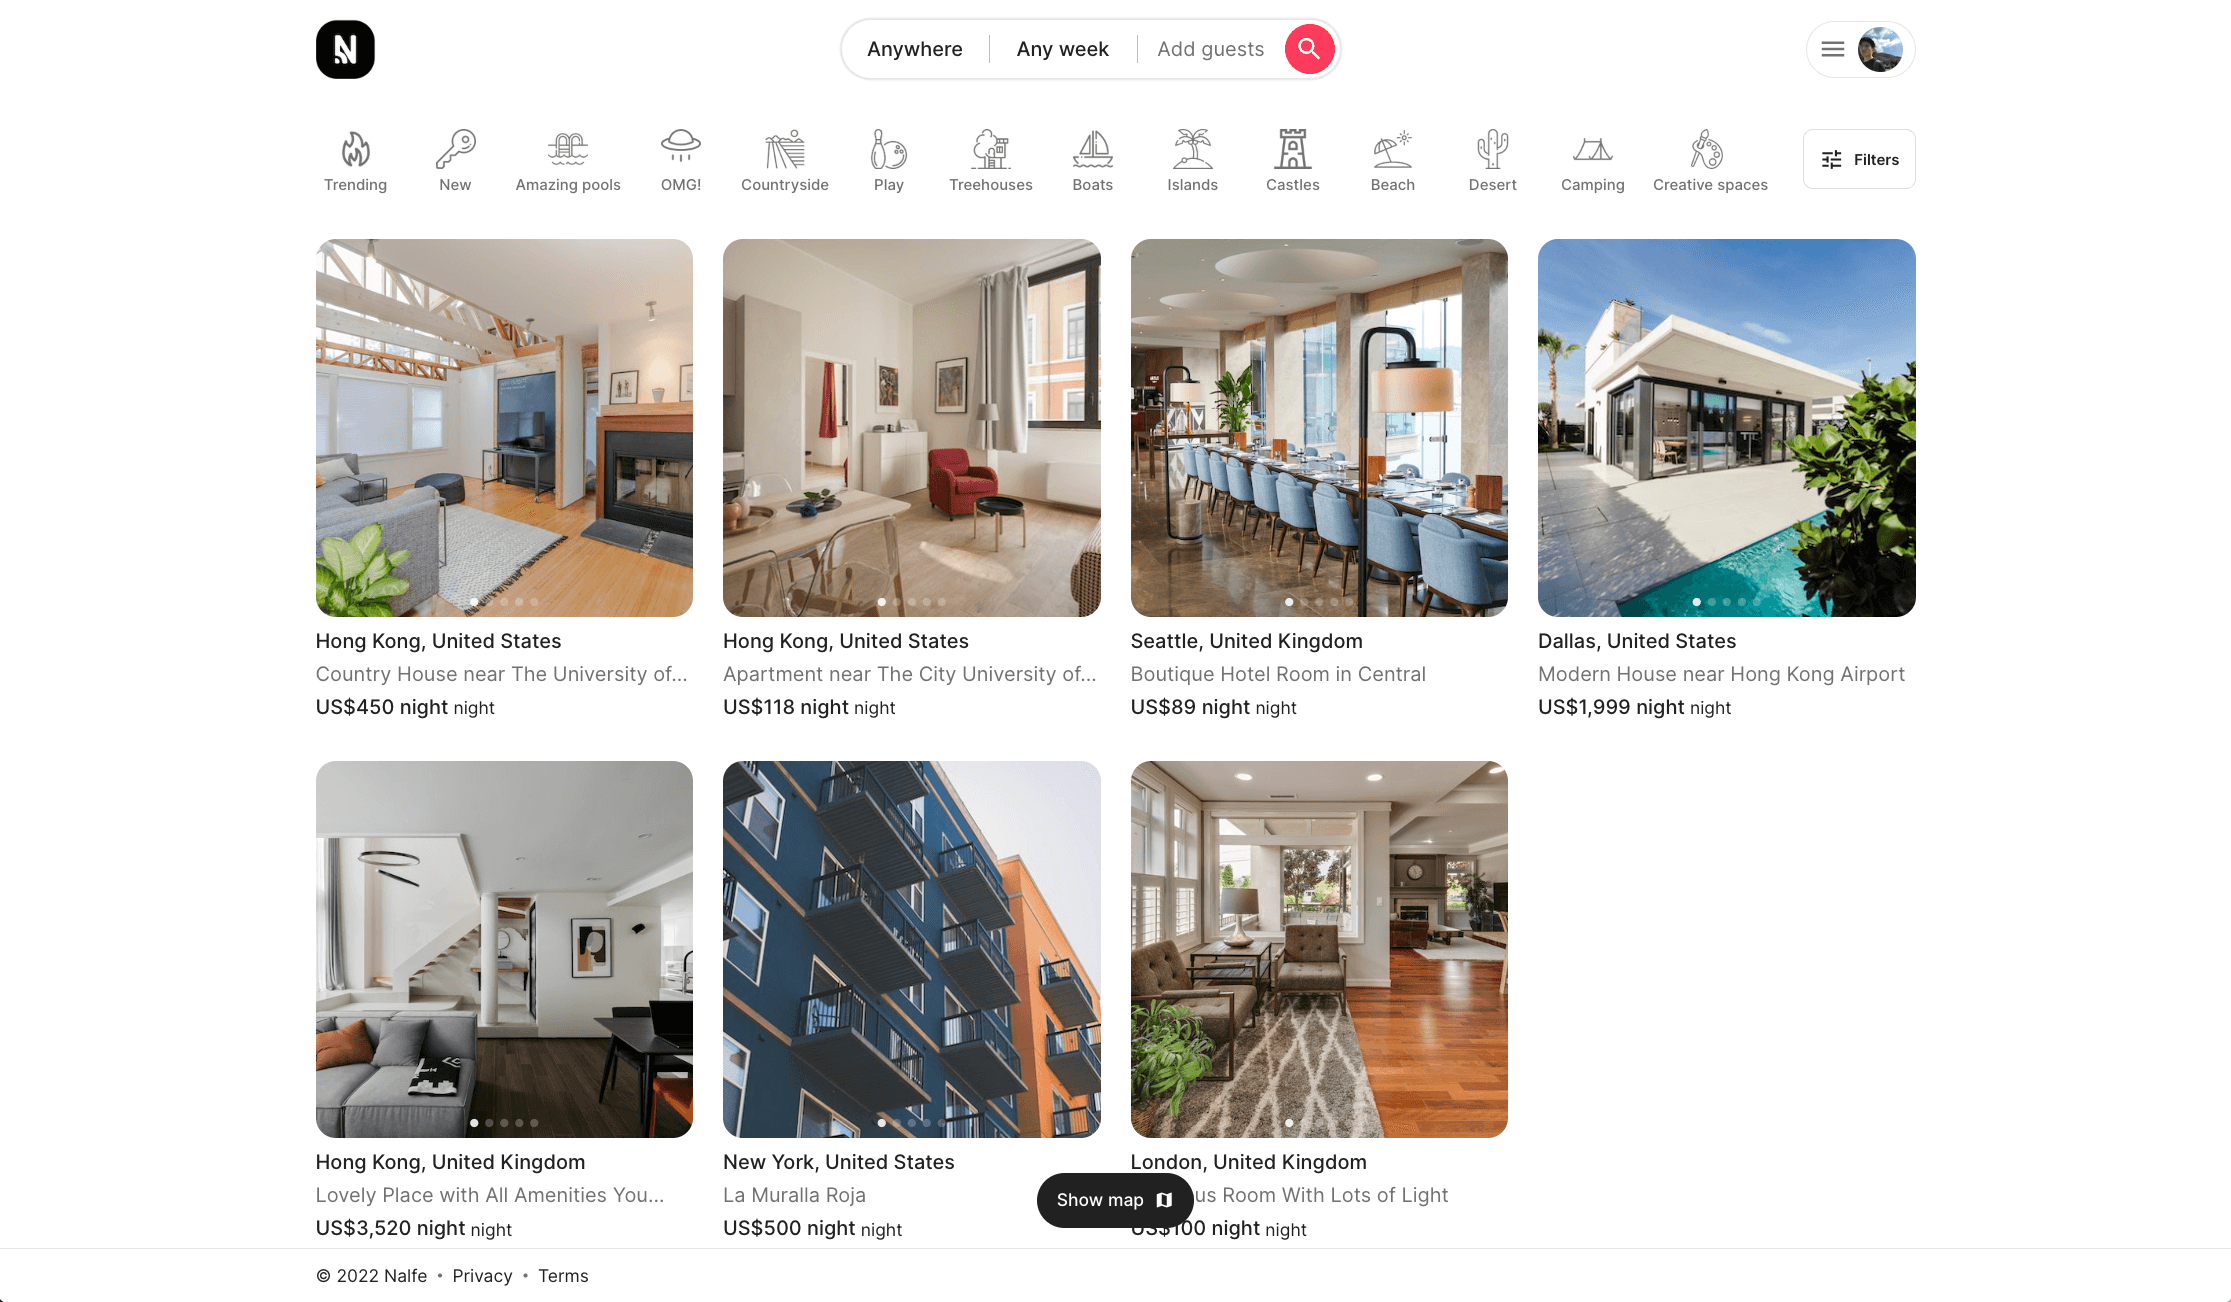
For this guide, imagine you’re running an Airbnb-like travel marketplace application (using this free Bubble travel marketplace template). Since marketplaces are transactional in nature, there are many opportunities for marketplace emails to be sent between a host and guest (or seller and buyer). For this tutorial, we’ll focus on a simple email notification that is sent to the host when a guest books a reservation request.
Step 1. Build a dynamic email template on Waypoint
Once you have an account on Waypoint, get started by using Waypoint’s visual builder to create a branded HTML template for a reservation request within our example Bubble marketplace application.
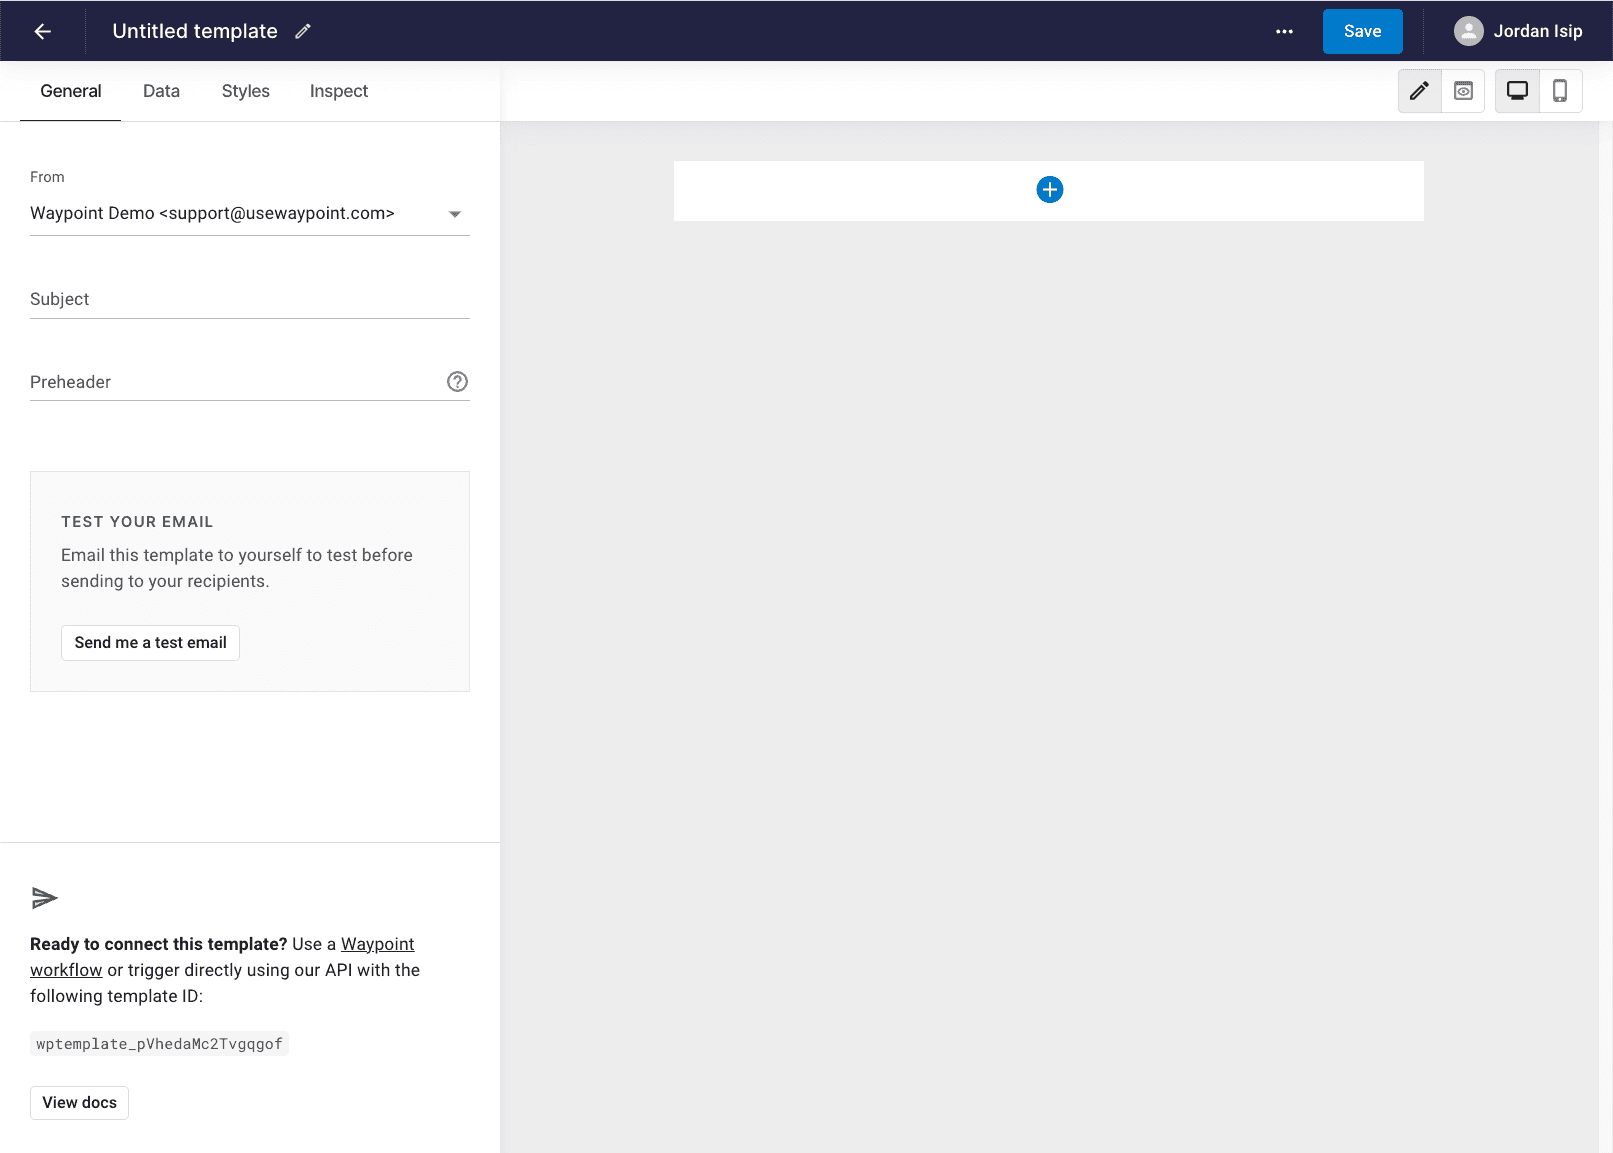
From your Waypoint workspace, go to the ‘Templates’ tab and click ‘new’ to start building a new email template.
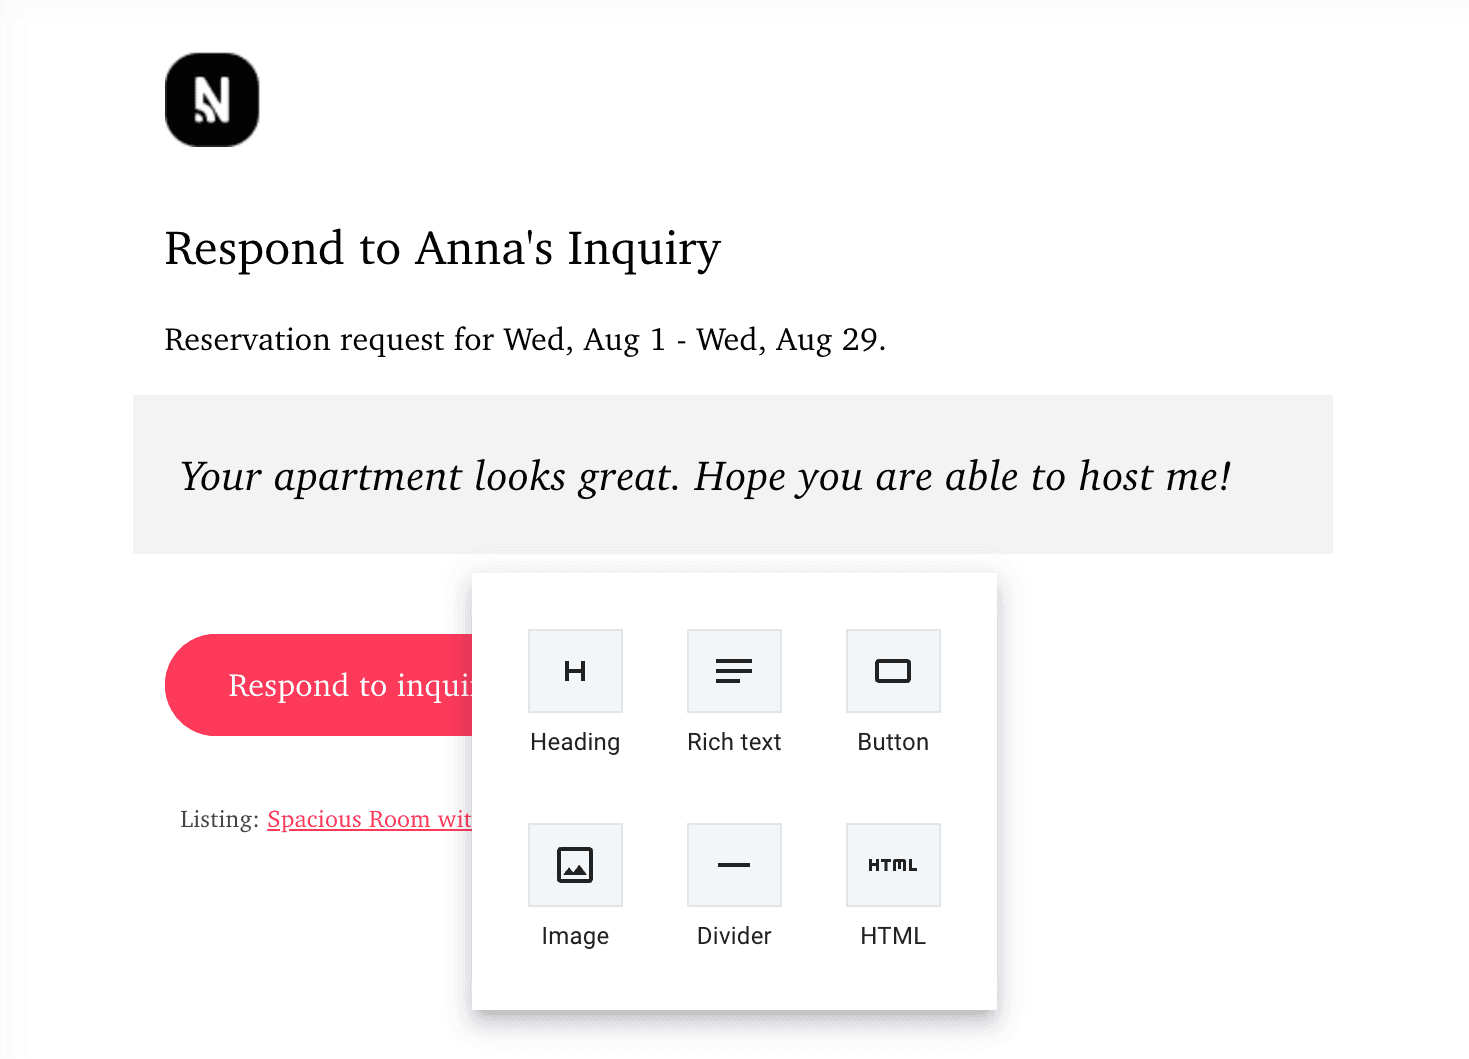
Click on the ‘+’ to start adding content blocks and use the sidebar to make style adjustments to match the branding. We recommend starting with a static design of this email. For this reservation request email, your design might look something like this:
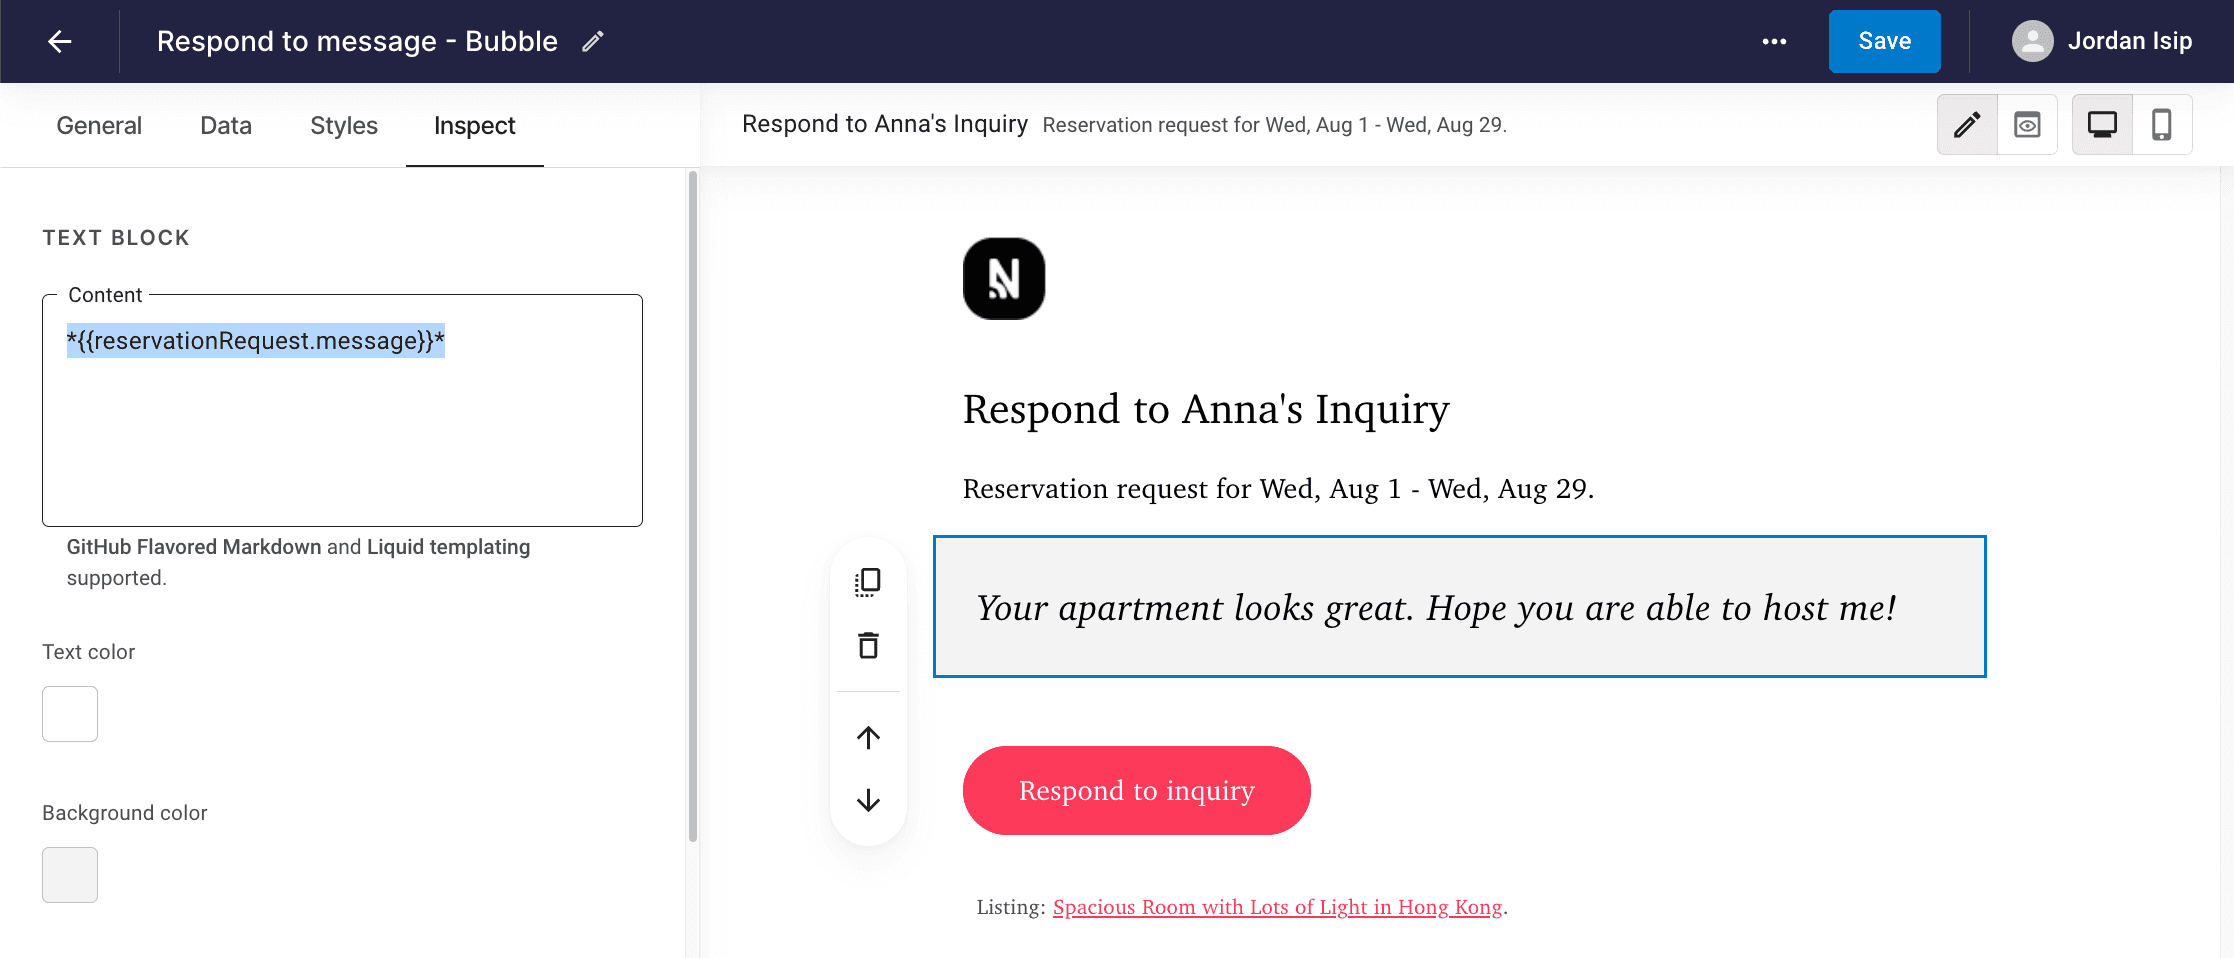
Once the design is in place, it’s time to switch out the static placeholder content for dynamic content. We can do this by first adding stubbed test data and variables into the template. Open the ‘Data’ tab and create JSON object for our test data (download example JSON). This is the data that will be replaced by real data from our Bubble app in the following steps.
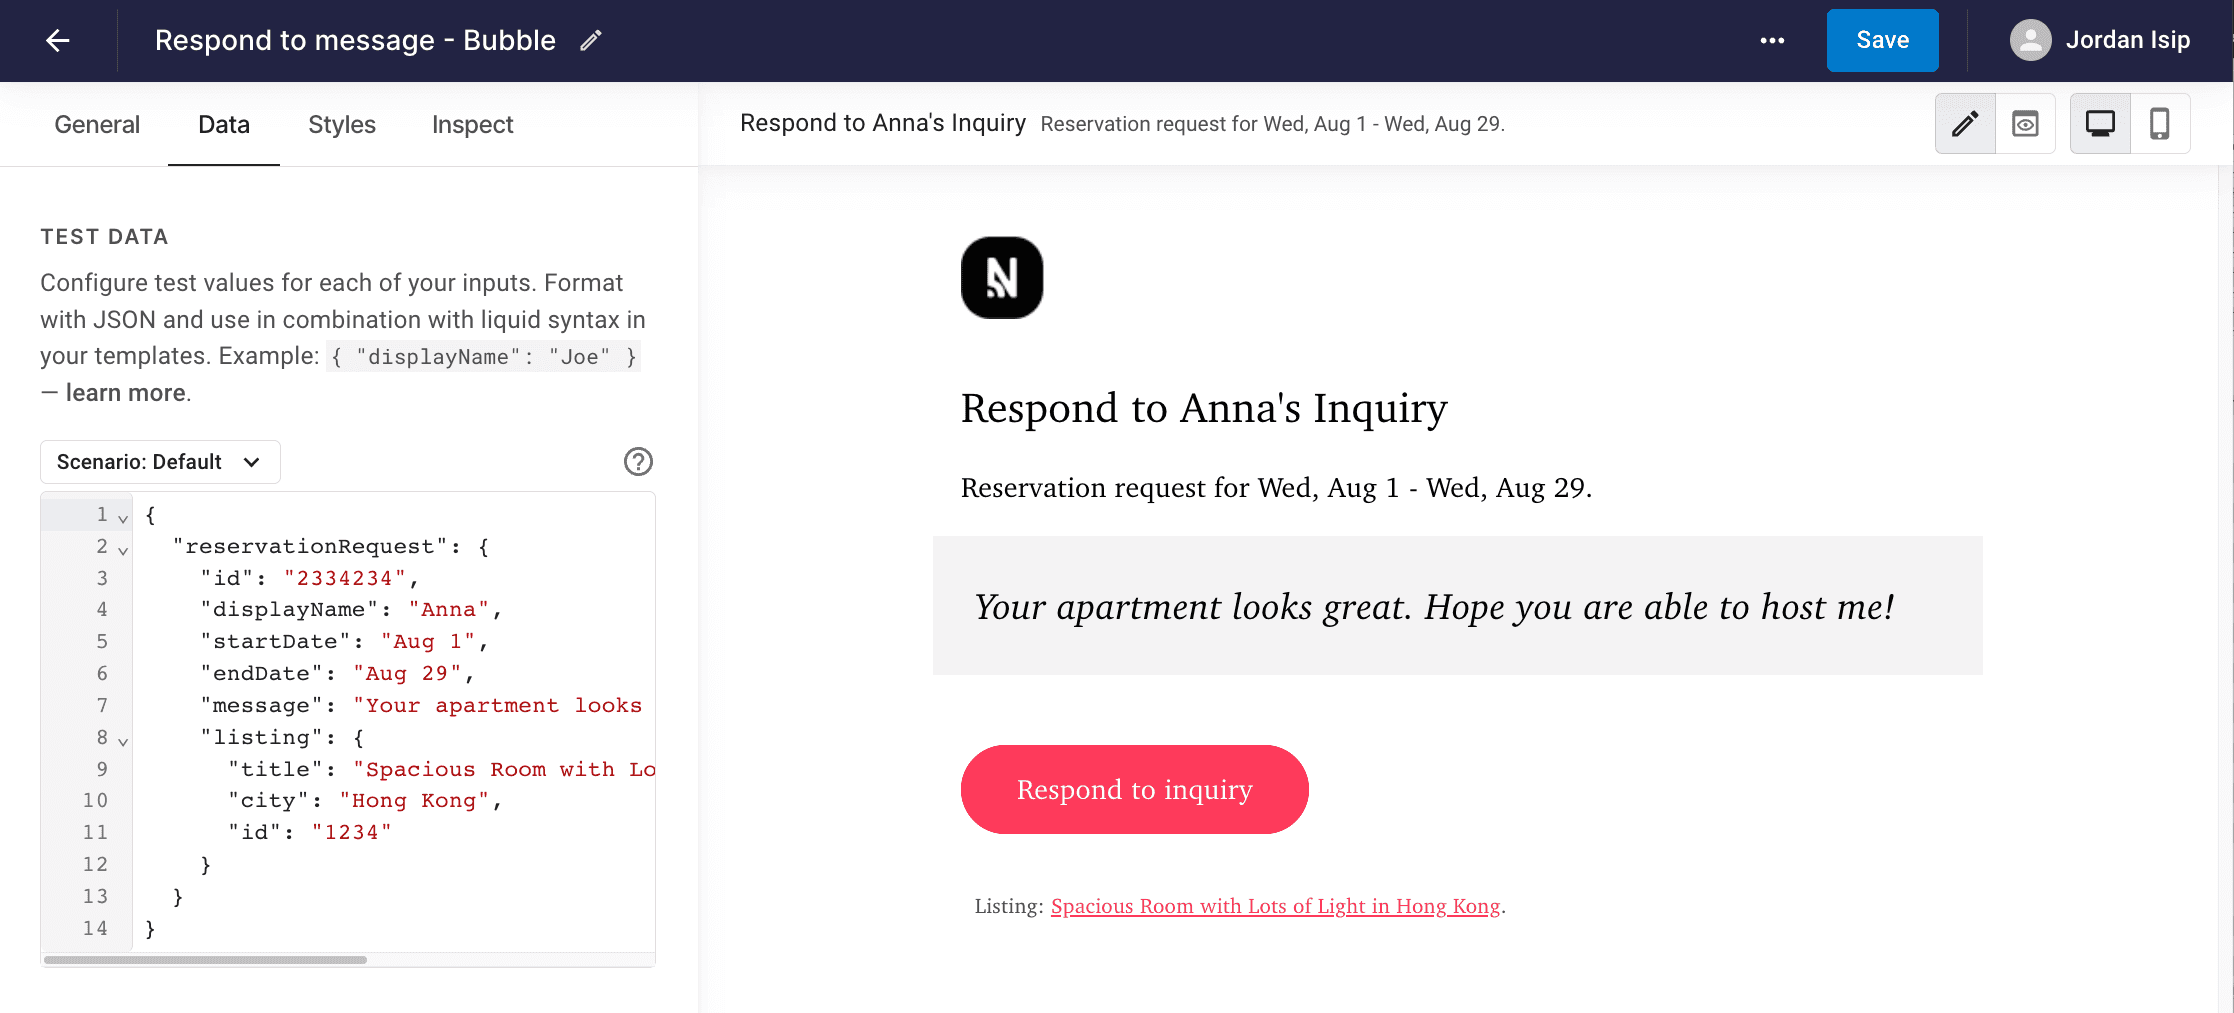
You can now reference these variables using Liquid templating within any text field in the template builder. For example, our ‘message’ data from a ‘reservationRequest’ object would be referenced from the template with
{{reservationRequest.message}}. On the right, you’ll be able to see a live preview showing the associated test data.
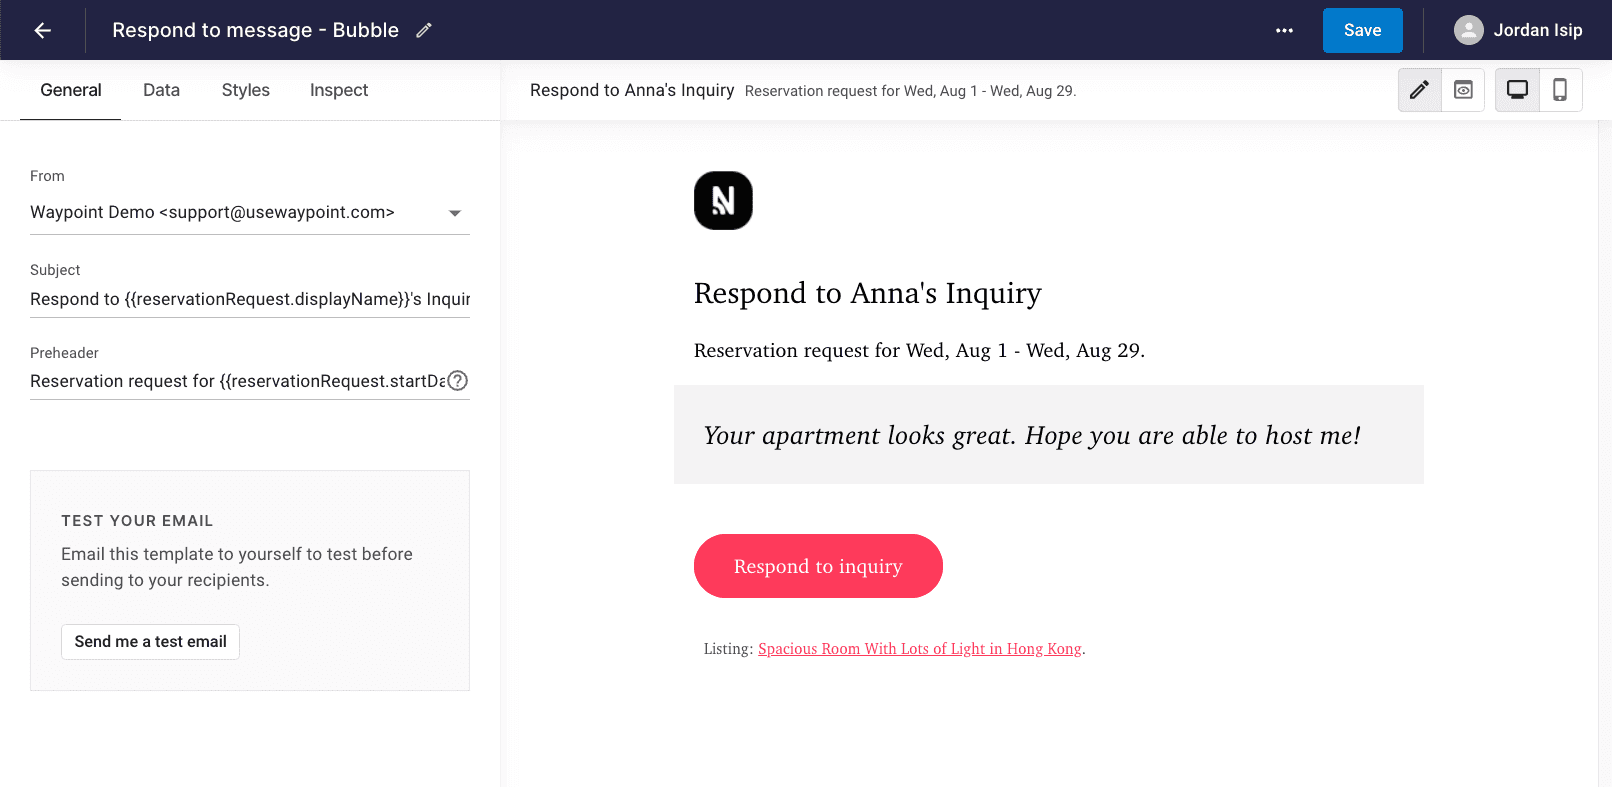
Lastly, configure the ‘From’, ‘Subject’, and ‘Preheader’ in the ‘General’ tab. Note that these fields can also accept Liquid templating. Eg. “Respond to
{{reservationRequest.displayName}}'s Inquiry”. We won’t get into the further details on how to build a template in this tutorial, but you can learn more about how to use Waypoint’s dynamic email templates.
Step 2. Add Waypoint API keys
Before we head over to Bubble, you’ll first want to setup API keys on Waypoint to allow Bubble to securely send data to Waypoint.
From your Waypoint workspace 'Settings' page, scroll down to the 'API keys' section.
If you don’t already have a key you want to use, click ‘Add key’ and follow the directions to add a new key.
Make note of the username and password for your API key as you'll need it in an upcoming step.

Step 3. Install Bubble’s ‘API connector’ plugin
If you already have Bubble’s ‘API connector’ plugin installed, you can skip to the next step.
From your Bubble dashboard, open your app in the editor.
Click on the 'Plugins' tab within your Bubble application's editor.
Click 'Add plugins'.
Search/browse to find 'API Connector' plugin by Bubble.
Click 'Install'.

Step 4. Configure Bubble’s 'API Connector' to integrate with Waypoint's email API
Next, configure the API connector to point to the Waypoint API keys that you created in step #3.
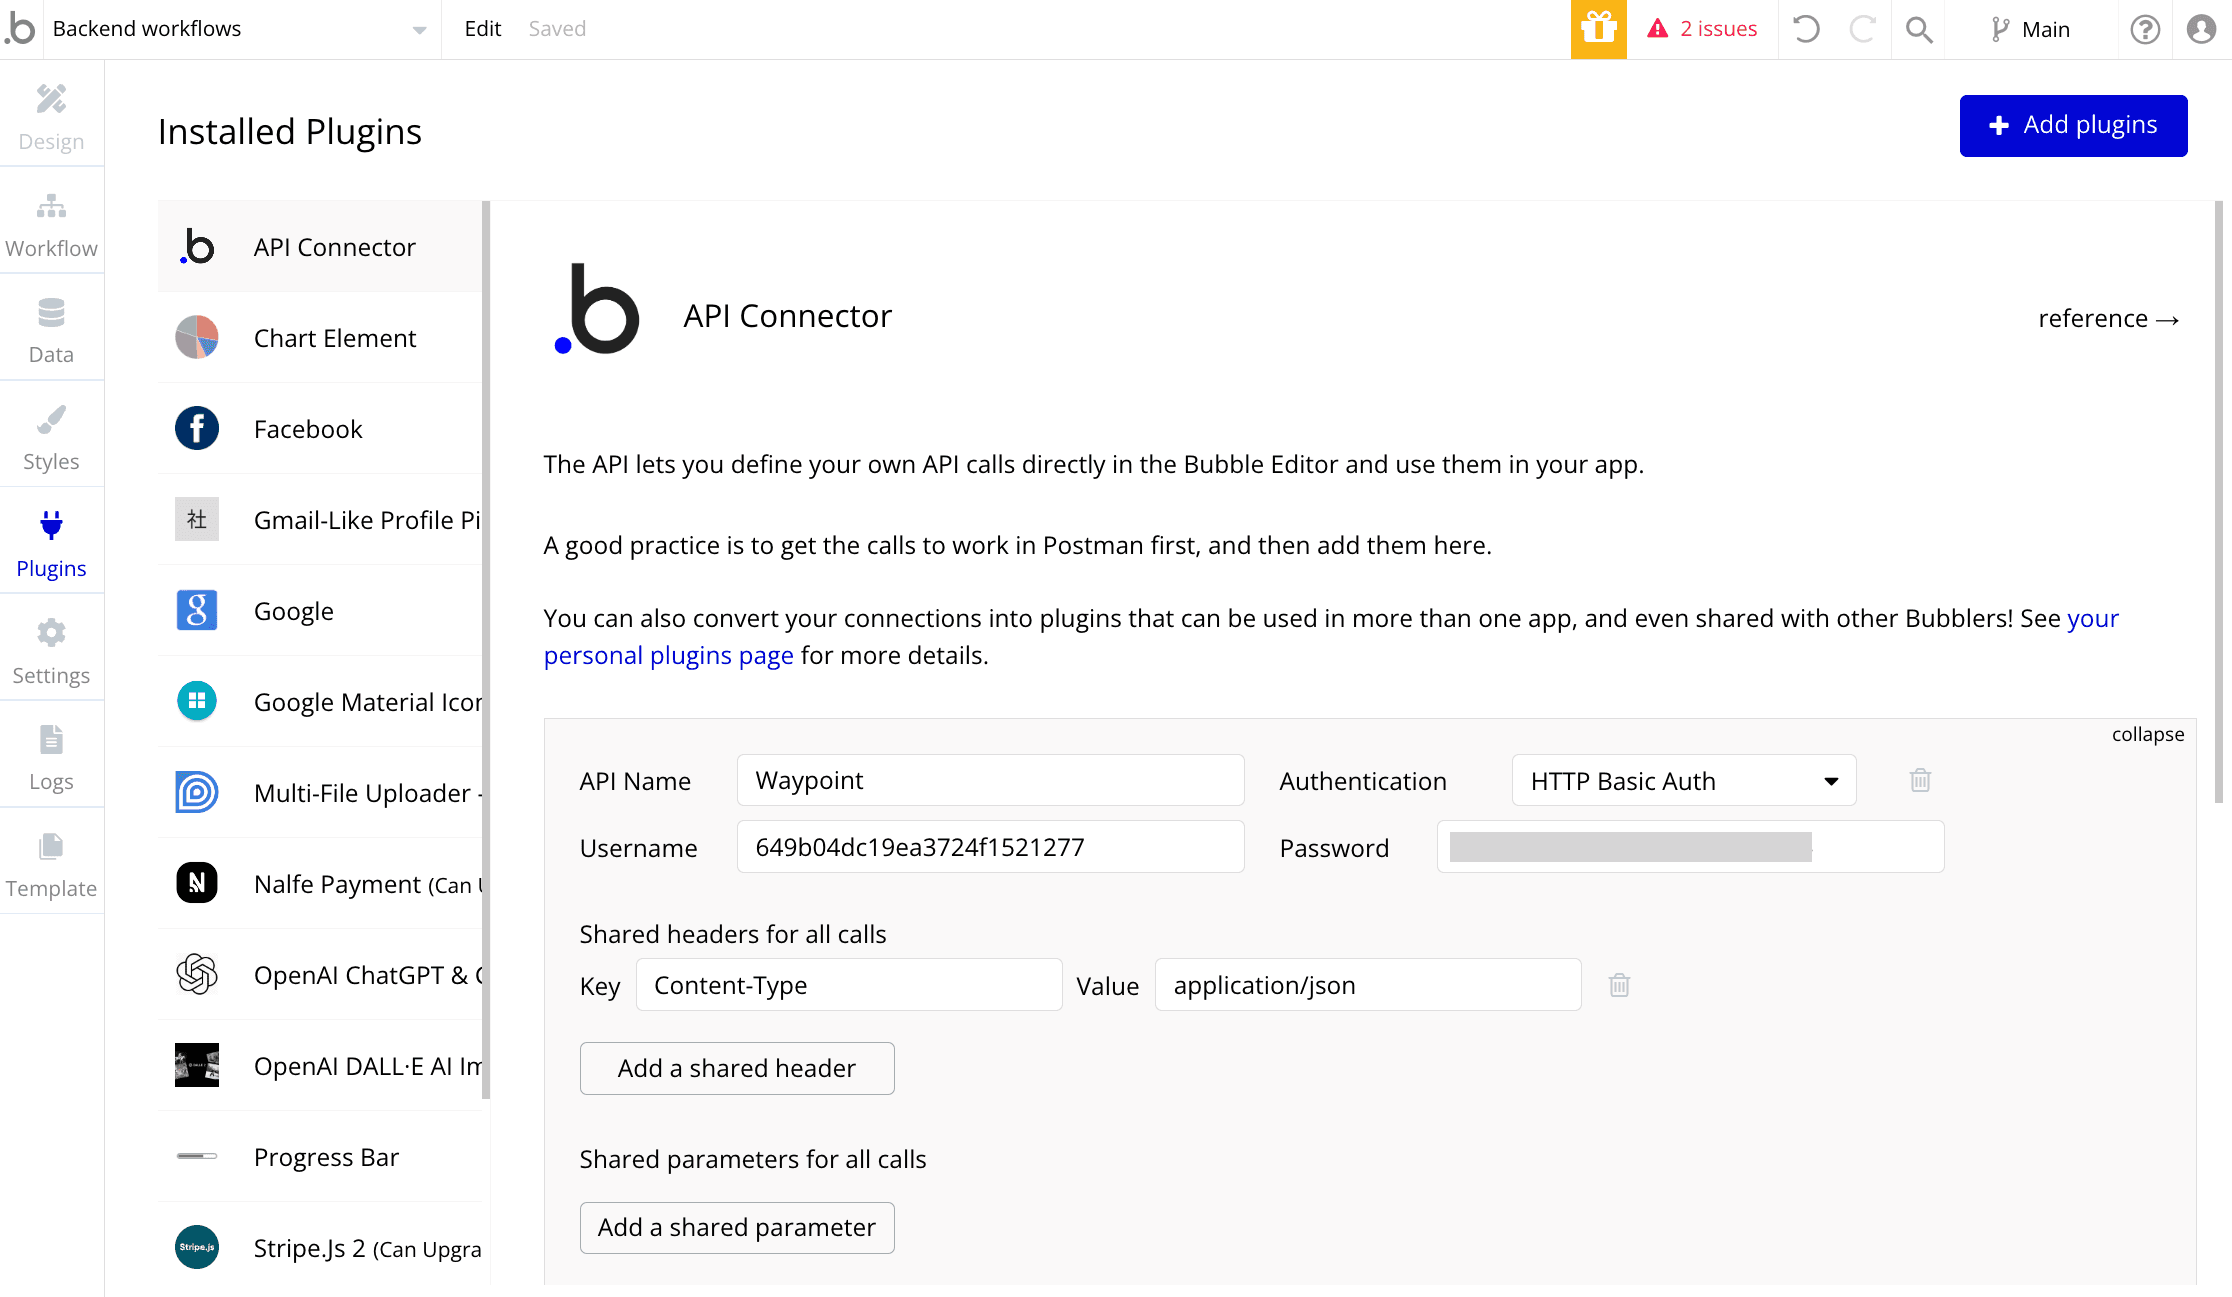
From the Plugins tab with 'API Connector' plugin selected, click on 'expand' next within the 'API Name' section to edit your new API connector. If you already have an API connected, you'll need to click on 'Add another API' button first.
Input the following:
API Name: 'Waypoint'
Authentication: 'HTTP Basic Auth'
Username: [username from Waypoint settings in step #3]
Password: [password from Waypoint settings in step #3]
Shared header
Key: 'Content-Type'
Value: 'application/json'
Step 5. Configure ‘API calls’ on Bubble
Within this new API connector, click on ‘expand’ button (or ‘add another call’ if needed). From here, you can now configure an API call that will be used to to trigger (and send data to) your dynamic template via Waypoint's API (/v1/email_messages).
Input the following:
Name: 'Message received email'
Use as: 'Action'
Data type: 'JSON'
Method: POST
Body JSON:
Download JSON – Note: this JSON object should look familiar. You can copy and paste from your test data on the Waypoint template in step 2 and replace static content with dynamic variables (Bubble uses <variable> syntax).
As you add dynamic variables on this body field, ‘body parameters’ are automatically appended below. These parameters allows you to setup test data on Bubble’s end. You’ll map this to actual dynamic data in the next step.

Replace all ‘sample’ default values with the same or a variation of the test data you used on Waypoint.
Uncheck all of the ‘private’ checkboxes next to each parameter.

Click 'Initialize call' to test the connection.
After successful connection, you'll be prompted to map data types.

Change the endDate, startDate fields to 'date' type.
If successful, an email with the test data provided will be sent through the Waypoint API and an email will be delivered to the
receiverEmailthat was set. Example of a delivered email:
Step 6. Configure a backend workflow on Bubble to trigger the email API call
The next step is to setup the trigger on your Bubble app that will call this newly created API call with the right dynamic data.
To simplify this tutorial, we’ll just send this email on every message that is sent (rather than on the first message in a new a reservation). To do this, we’ll configure a backend workflow on Bubble to trigger the API call after a new message entry in our database:
Within your Bubble application's editor, click on the page dropdown and click on ‘Backend workflows’.

Click on ‘Add a backend workflow…’
From the dropdown, select ‘General’ > ‘New database trigger event…’.

Input the following to create the database trigger event which will be called every time a new message is created on your app:
Event name: 'Message sent'.
Type: ‘message’

With the new database trigger still selected, click on ‘Click here to add an action’ button.
From the new action dropdown, select your newly created API call – click on 'Plugins' > 'Waypoint - Messaged received email’.
Within the dialog, map each field to the actual dynamic data your API call (and dynamic template) is expecting. By default, the test data is shown, but you’ll want to click on each field and on the ‘Insert dynamic data’ button to reference variables by traversing objects on Bubble. For example, a listingTitle variable might map to the message’s conversation’s reservation’s listing name.

Step 7. Confirm the Waypoint email integration is working end-to-end
Everything should now be setup end-to-end 🎉. Now when a message is posted, a database trigger is fired which passes the associated data to the API call on Bubble, which passes the data to API call on Waypoint (via API connector plugin), which triggers the given dynamic template on Waypoint and delivers the email.
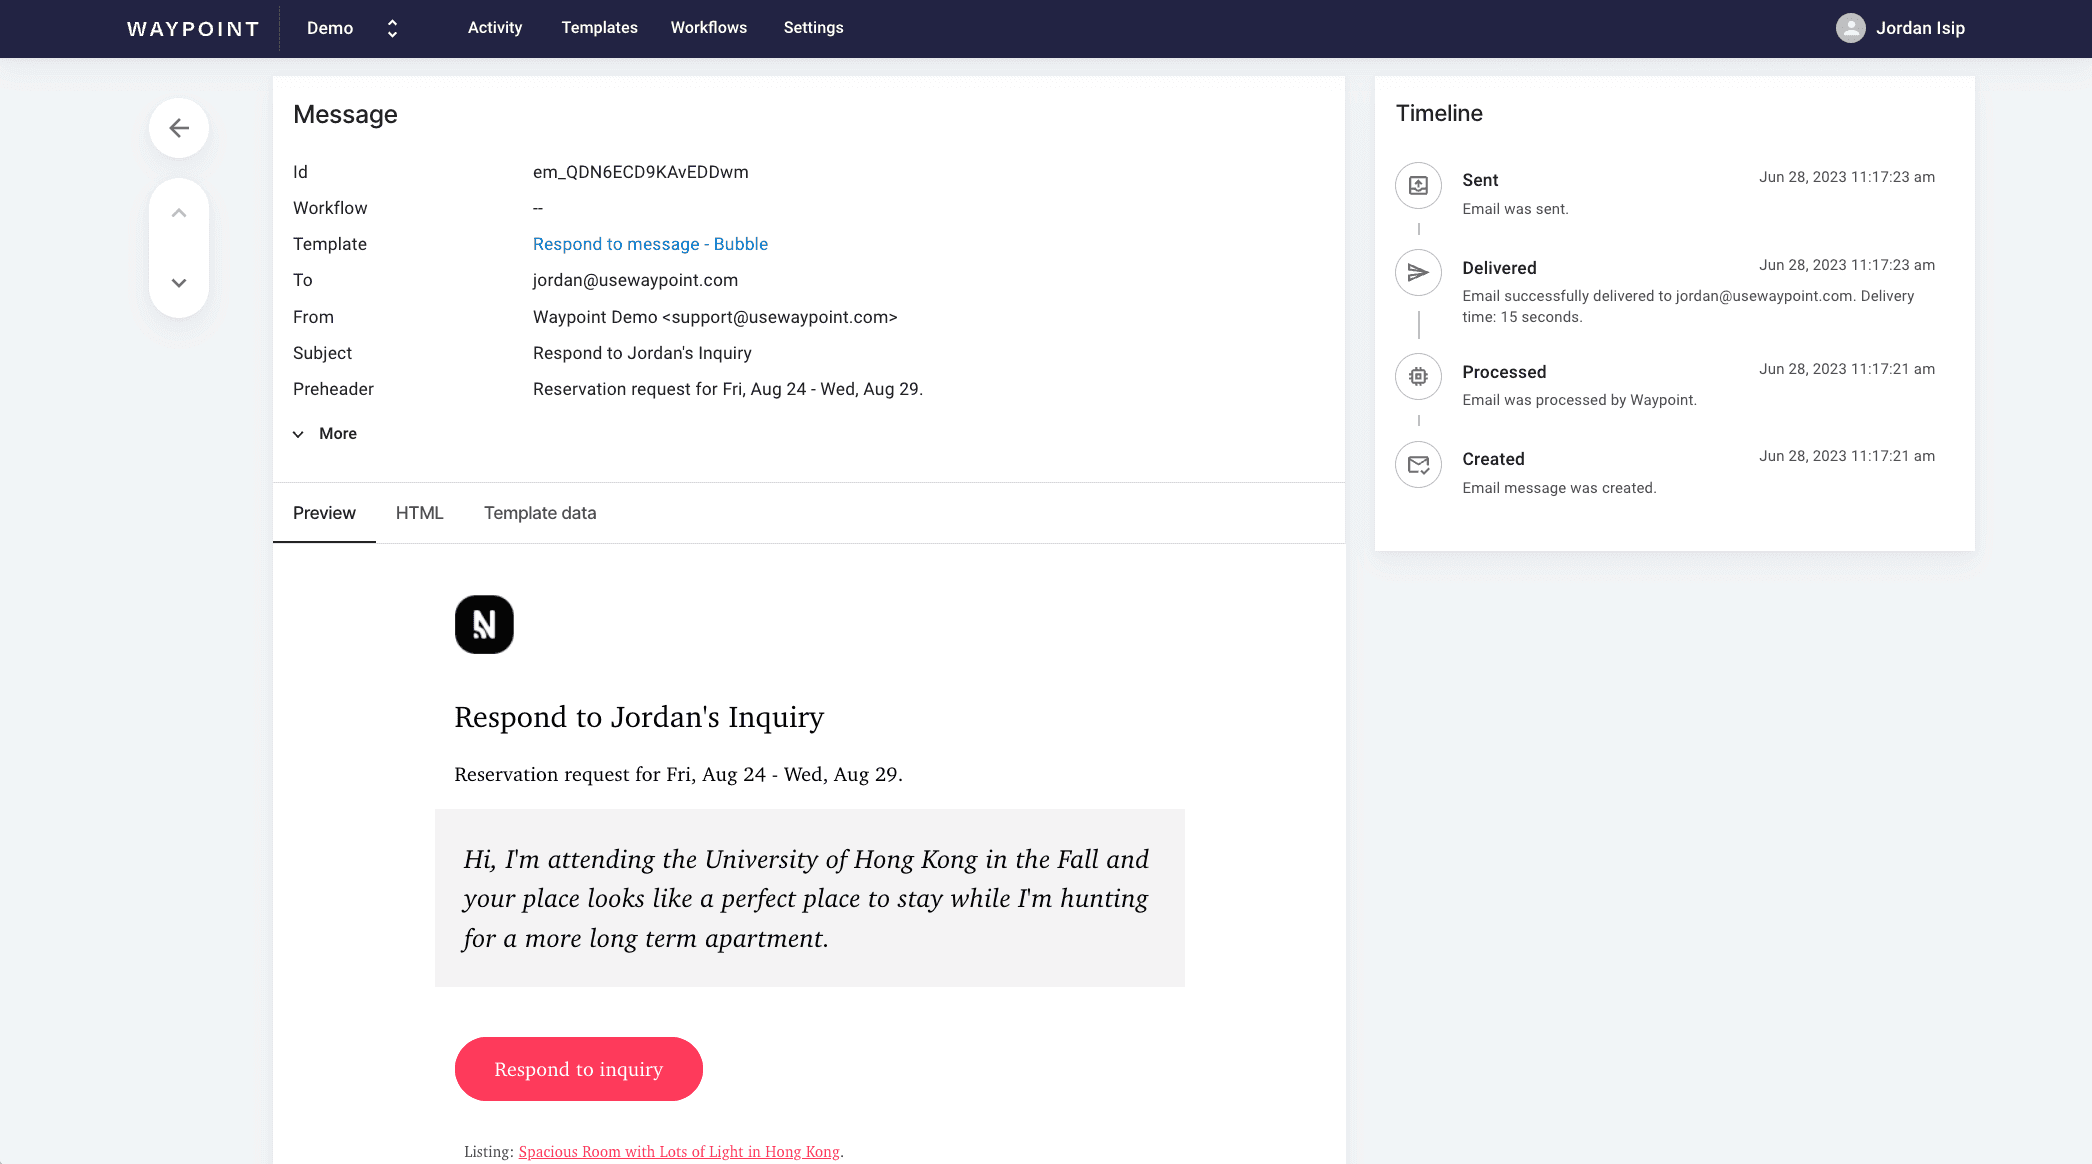
Now when you preview your app on Bubble and send a message, you should be able to see this end-to-end process in action. Assuming everything is working, you can monitor emails that are sent on Waypoint:
Not working on your end? We’re happy to help: support@usewaypoint.com.
Further reading
Don’t have a Waypoint account yet? Request an account today.
