Verified domains
Before you can send live emails on Waypoint, you must setup a custom domain that you own (ie. yourcompany.com and not gmail.com).
Adding a verified domain
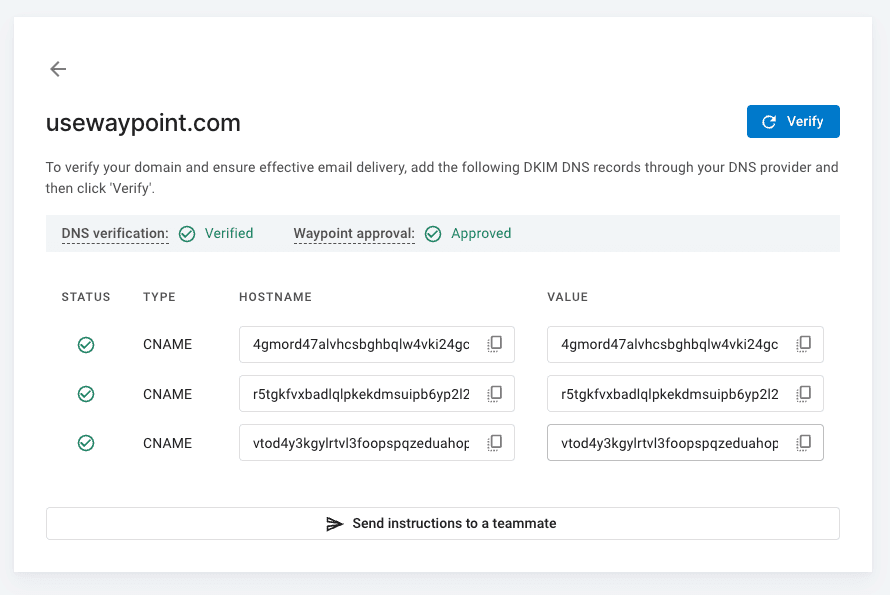
In order for Waypoint to verify that you own the domain, you’ll need to add a set of DKIM records through your DNS provider. To do this:
- Head to your workspace’s settings page.
- Scroll to the ‘Verified domains’ section.
- Click on ‘Add’.
- Enter the domain you want to send from (eg. yourcompany.com).
- After the domain has been added on Waypoint, follow the instructions to add the associated DNS records to your domain registrar.
- Once added, click ‘Verify’ to have Waypoint check for the records. Please note that DNS records may take up to 24 hours to propogate.
After verification, the Waypoint team will automatically be notified for approval. All domains are manually reviewed by the Waypoint team to help maintain high deliverability scores across the platform. Typically reviewed within 24 hours.
What about SPF records?
In the past, email providers checked SPF alignment using the From/Sender address’ domain. Now, they use the Return-Path domain instead. This means you no longer need to add a custom SPF record to your DNS. All emails sent through Waypoint automatically pass SPF alignment.
What’s next?
After adding a domain, we recommend adding an approved sender. This is the email address you will send emails from (eg. support@yourdomain.com).