Unsubscribe groups
Unsubscribe groups allow your team to append an unsubscribe link to a related set of emails. When a contact unsubscribes, they will be opted-out and will not receive any additional emails with the matching unsubscribe group.
To append the unsubscribe link to an email, create an unsubscribe group and reference it while sending a templated email API (with the groupId or groupKey properties).
Since Waypoint manages the unsubscribes and the unsubscribe page, software teams can give their users the option to unsubscribe from a set of emails with a single line of code.
Tutorial
Section titled “Tutorial”Let’s pretend we are sending a series of onboarding emails based on user activity on our platform and want to allow users to unsubscribe from this group of emails.
Step 1: Create an unsubscribe group
Section titled “Step 1: Create an unsubscribe group”We’ll first need to create an unsubscribe group. Within our workspace, we’ll go to ‘Contacts’ and click on the ‘Unsubscribe groups’ link.

Within the Unsubscribe groups page, we’ll click ‘New’ to create a new unsubscribe group.
Within the form, we have the following options:
- Group name – this group will be publicly shown on the unsubscribe page (see Step 3).
- Custom ID key – this is an optional descriptive key that you can use on API calls instead of the generated ID (see Step 2).
- Unsubscribe section content – this is the content that will be appended to your template with the special
unsubscribeUrlvariable. Formatted in Markdown.
Let’s call our unsubscribe group, ‘Onboarding’, give it a custom key of onboarding that we’ll reference in the next step, and leave the unsubscribe section content as the default.

Step 2: Send an email with an unsubscribe group
Section titled “Step 2: Send an email with an unsubscribe group”With the unsubscribe group created, we can now reference it from our API call when sending a templated email API.
Since we added a custom key for our unsubscribe group, we’ll use the groupKey property. Otherwise, we’d use the groupId property.
const axios = require('axios');
axios({ method: "post", url: "https://live.waypointapi.com/v1/email_messages", headers: { "Content-Type": "application/json" }, auth: { username: API_KEY_USERNAME, password: API_KEY_PASSWORD }, data: { "templateId": "wptemplate_ABc123XYZ", "groupKey": "onboarding", "to": "jordan@usewaypoint.com", "variables": { "displayName": "Jordan", } }}).then(function (response) { console.log(response);}).catch(function (error) { console.log(error);})Step 3: View the email with the unsubscribe link
Section titled “Step 3: View the email with the unsubscribe link”After a successful send, we can go back to our ‘Activity’ page and click on the latest message. Within the email log, we can see the associated unsubscribe group as well as the unsubscribe link on the preview of the email.

Step 4: Test the unsubscribe
Section titled “Step 4: Test the unsubscribe”With our unsubscribe group and link now successfully setup, let’s make sure everything is working end-to-end.
When we click on the ‘Unsubscribe’ link from the email log (from Step 3) or from the actual email that was sent, we’ll see the unsubscribe page hosted by Waypoint.
Note that our group name is publicly shown (from Step 1) – “Opt out of [group name] emails”.

Let’s click ‘Unsubscribe’ to test the unsubscribe.

Now that we’re unsubscribed, we can go back to our unsubscribe group (from Step 1) and we’ll see the unsubscribed contact in our unsubscribe group.

Additionally, if we go back to our email log (from Step 3), we can see the unsubscribe event in the timeline.

Step 5: Test the suppression
Section titled “Step 5: Test the suppression”With the contact now unsubscribed, we’ll do Step 2 again but send a different email to the contact with the same the unsubscribe group.
Because our contact is unsubscribed from the unsubscribe group, the resulting email is suppressed but can still be seen from the logs:

Additionally, suppressions and unsubscribes can be viewed and filtered from the ‘Activity’ page:

Step 6: Wrap up
Section titled “Step 6: Wrap up”We’ve now setup our unsubscribe group and have tested the unsubscribe link end-to-end. We can now remove our test contact from our unsubscribe group by going back to the Unsubscribe Groups page and clicking on the ’-’ next to the contact name.

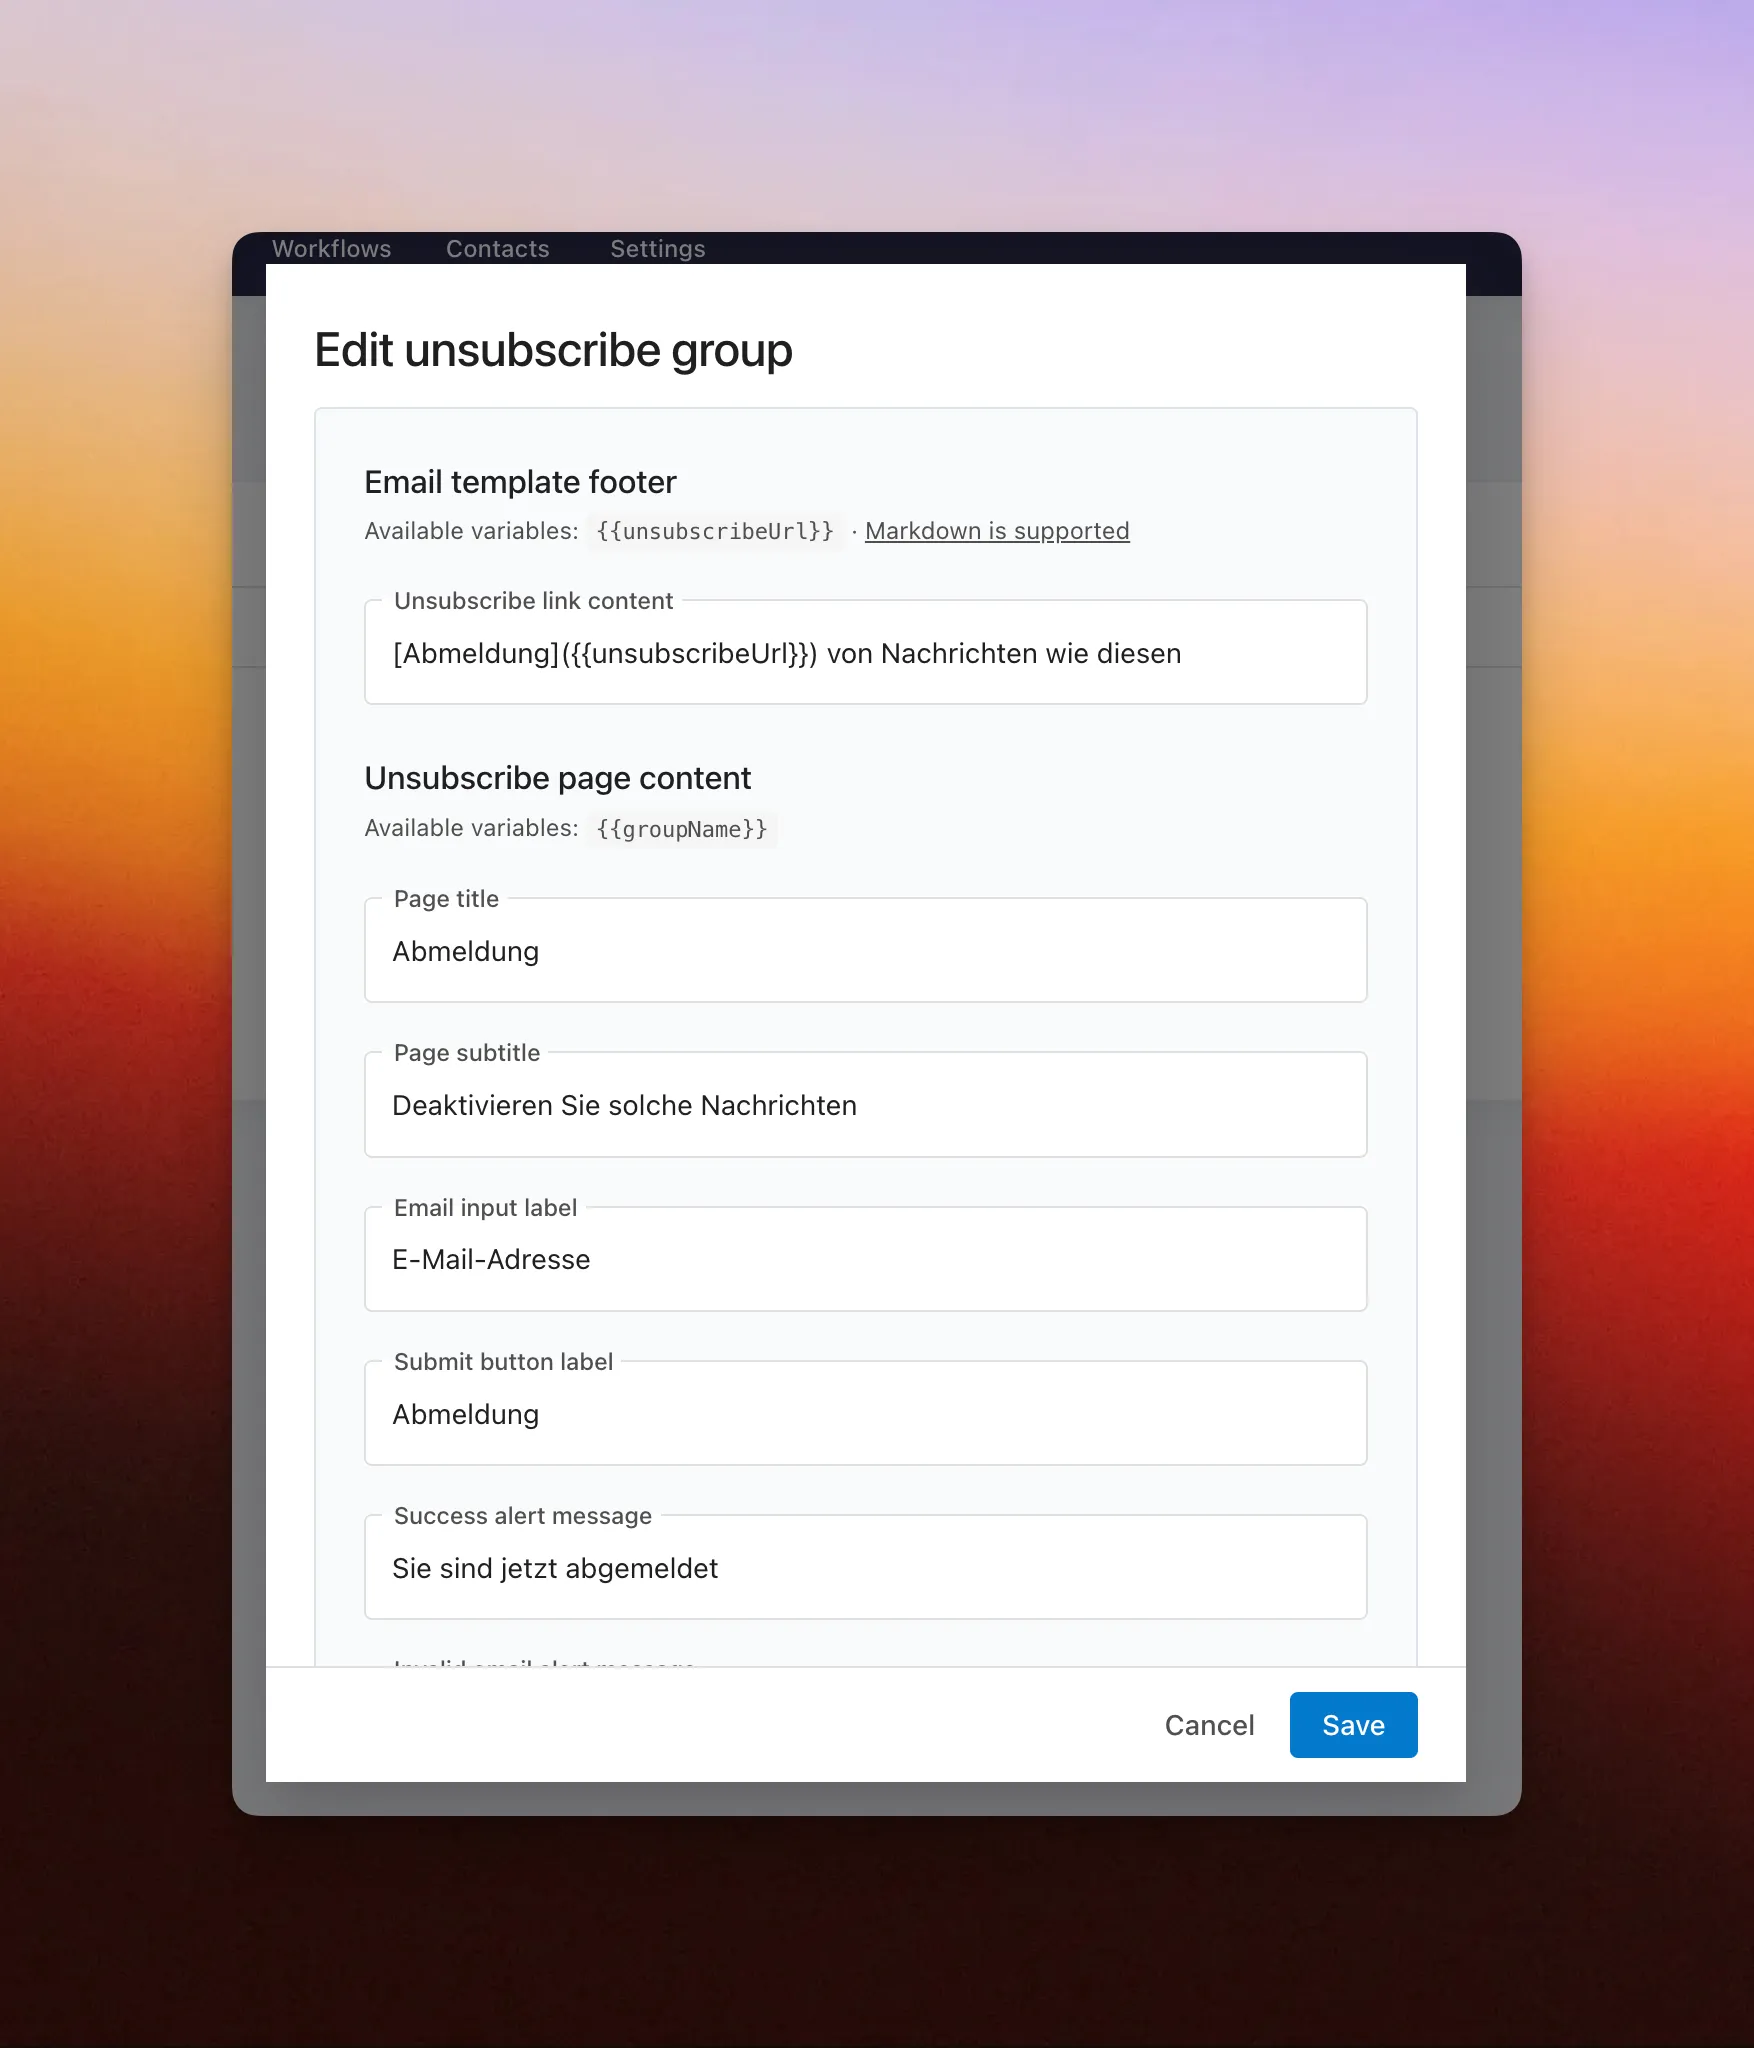
Customization
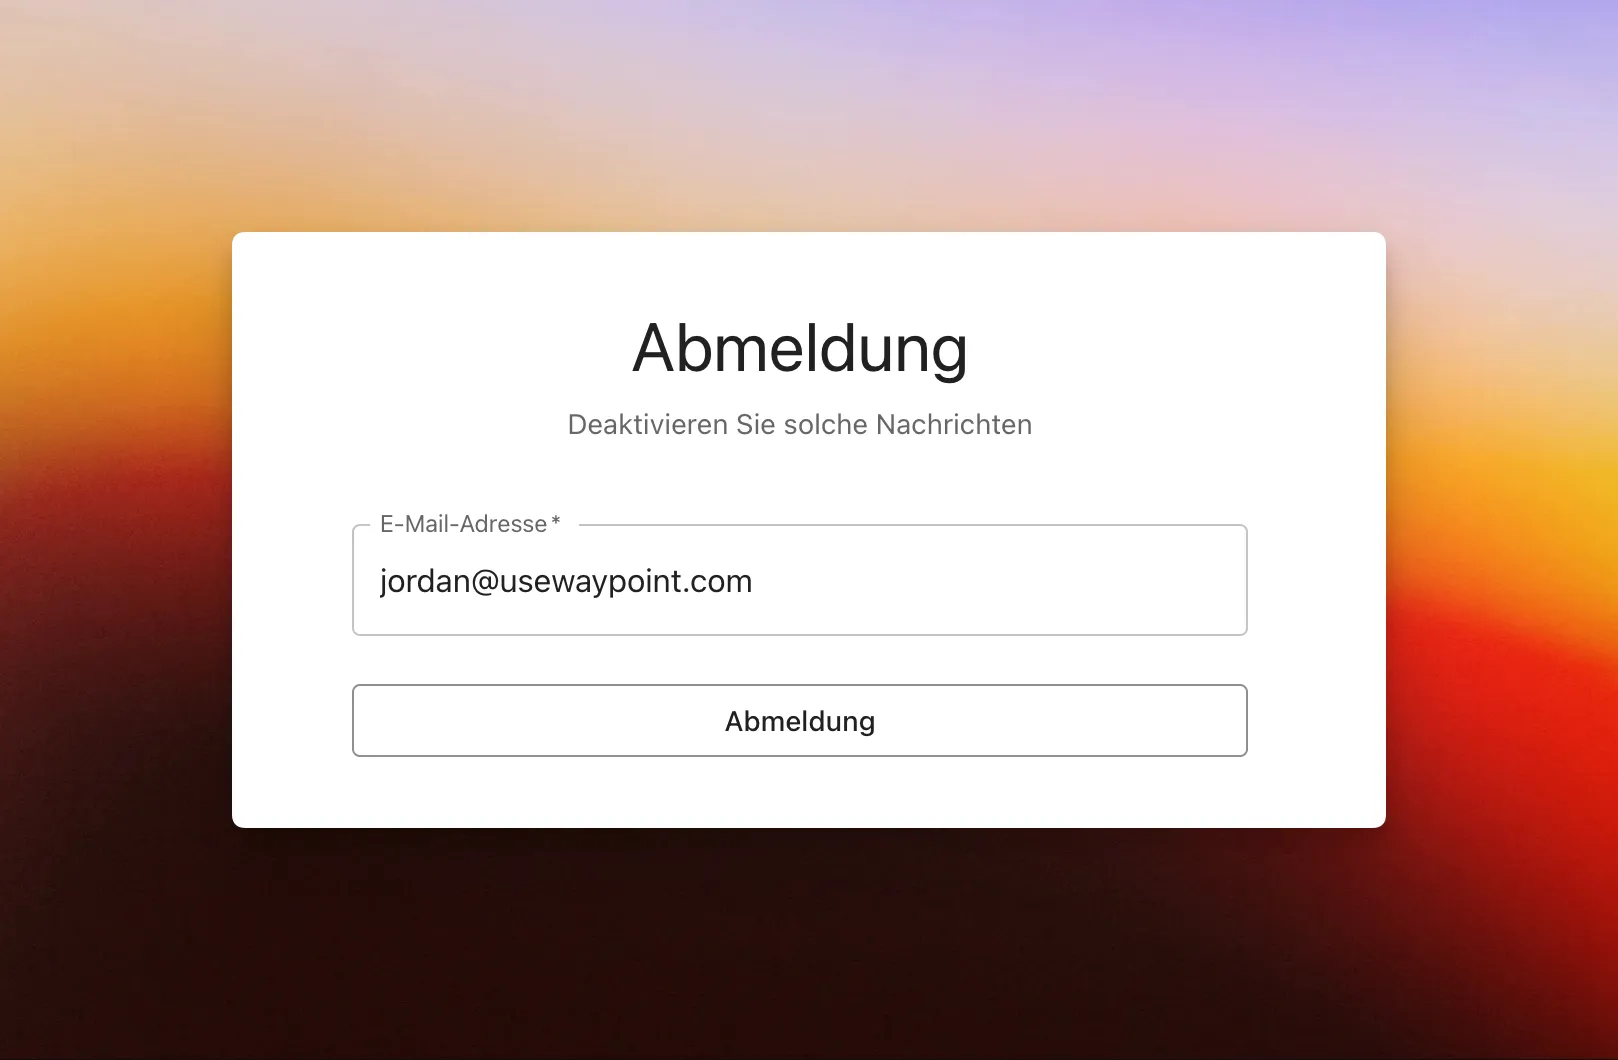
Section titled “Customization”Tailor the text that appears in your unsubscribe links and unsubscribe landing pages directly within your Unsubscribe Group settings. This gives you full control over the messaging users see when managing their email preferences.
This is especially useful for localization, allowing you to present unsubscribe options in different languages or regional tones to better match your audience.
Limitations
Section titled “Limitations”- Unsubscribe groups are not currently supported when sending without a template.